KAMBERI GROUP/en: Unterschied zwischen den Versionen
(→Backend PoS-Produktkategorien löschen) (Markierung: 2017-Quelltext-Bearbeitung) |
(Translation) |
Inhaltsverzeichnis
-
1 Operating Manual
- 1.1 Management Entrance Unit
- 1.2 Management Exit Unit
- 1.3 Management Cashbox Card Issue
- 1.4 Management Cash Register
- 1.5 Management Employee
- 1.6 Registration Ladies
- 1.7 Lockers Management
-
1.8 Backend Administration
- 1.8.1 Analysis Card Usage
- 1.8.2 Create Backend POS Product Categories
- 1.8.3 Delete Backend POS product categories
- 1.8.4 Produktkategorien anlegen Create Product Categories
- 1.8.5 Produktkategorien ändern oder löschen Change or Delete Product Categories
- 1.8.6 Backend/Produkte anlegen/ hinzufügen und ausblenden, MwSt. Satz eintragenCreate/Add and Hide products
- 1.8.7 Ersatz- oder neue Produkte hinzufügen
- 1.8.8 Produktzuordnung Damen Provision
- 1.8.9 Backend/ Karten Historie
- 1.8.10 Backend/Personen anlegen
- 1.8.11 Backend/Personen deaktivieren
- 1.8.12 Backend/Kassensitzung
- 1.9 MwSt. Satz eintragen, verändern und anzeigen.
- 1.10 Backend/Ticketnutzung
- 1.11 Backend/Spindnutzung
Operating Manual[Bearbeiten | Quelltext bearbeiten]
Management Entrance Unit[Bearbeiten | Quelltext bearbeiten]
Day Ticket Gentleman
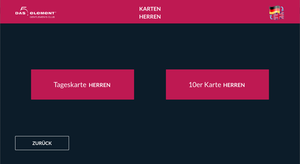
First, press the button Gentleman.
Make your selection.
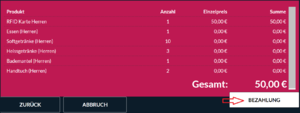
Day ticket Gentleman.
Tap on Payment at the bottom right and then select your payment method.
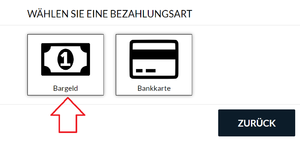
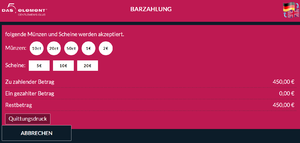
Select payment method and pay (cash in the example).
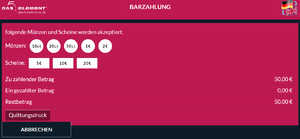
Payment
10er-Card Gentleman
Press the button Gentleman.
Make your selection.
10er Card Gentleman.
Tap on Payment at the bottom right and then select your payment method.
Select payment method and pay (cash in the example).
Payment
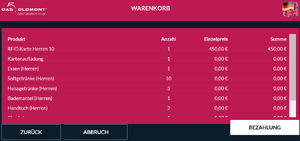
Check-In procedure 10 uses Card Gentleman
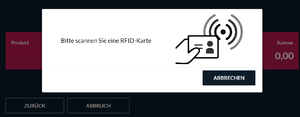
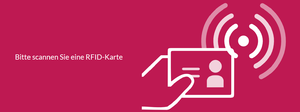
Please scan an RFID card
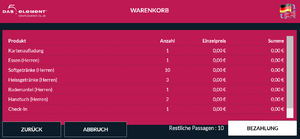
After scanning the RFID card, the machine shows you a general overview and its remaining passages. Please press "Payment".
You will now see "Process Completed" and can enter through the gate.
Check-In procedure Ladies Card
Please scan an RFID card
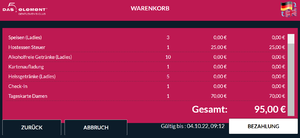
After scanning the RFID card, the machine shows you a general overview, the total amount to be paid, the products and the validity of the card.
Please press "Payment"
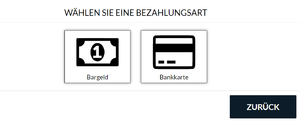
And then select a payment method.
After the payment process you can enter through the gate.
____________________________________________________________________________________________________________________________________________
Management Exit Unit[Bearbeiten | Quelltext bearbeiten]
Please scan an RFID card
(in Bearbeitung)......... __________________________________________________________________________________________________________________________________________
Management Cashbox Card Issue[Bearbeiten | Quelltext bearbeiten]
POS / RFID - Ladies Card Free Entry[Bearbeiten | Quelltext bearbeiten]
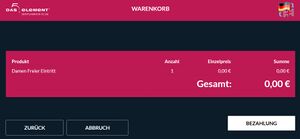
Press Button Ladies Free Entry.
Please scan an RFID card.
Press the Payment Button.
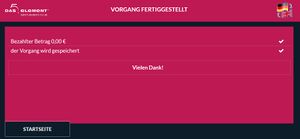
Process completed.
1. Check-In at Vending Unit
2. Access through the Gate
3. Only then is it possible to purchase products.
POS / RFID - Card Gentleman Free Entry[Bearbeiten | Quelltext bearbeiten]
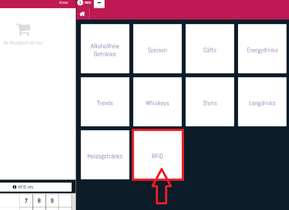
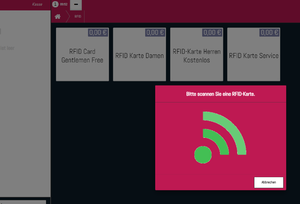
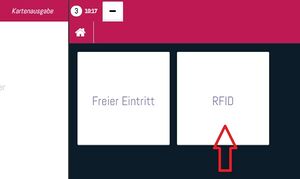
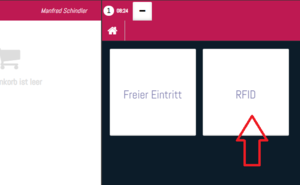
Select the product RFID.
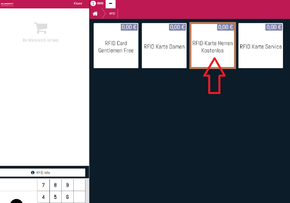
Then select the product RFID Card for Gentleman free of Charge.
Please scan an RFID card.
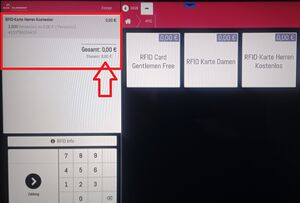
The free Gentleman's Card with €0.00 is now displayed in the Checkout Field.
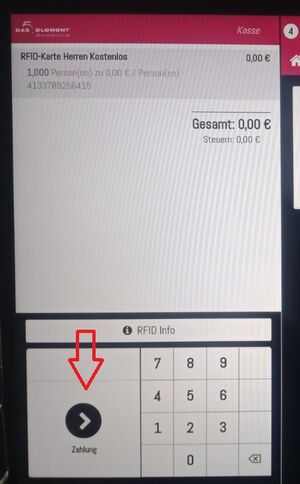
Now press payment.
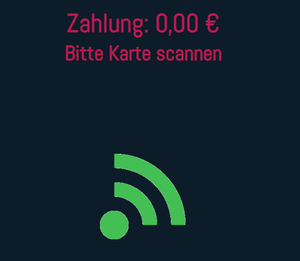
The prompt Payment: 0.00 € please scan card appears, now please scan the Master Card.
1. Check-in at the Vending Unit
2. Access through the Gate
3. Only then is it possible to purchase products.
______________________________________________________________________________________________________________
POS / RFID - Ladies Card[Bearbeiten | Quelltext bearbeiten]
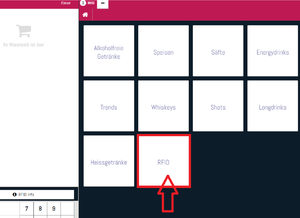
Select the product RFID.
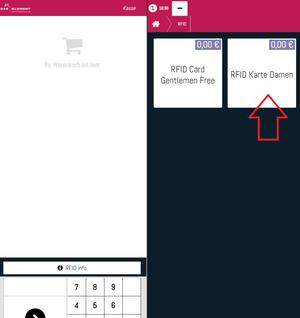
Select the product RFID Card Ladies.
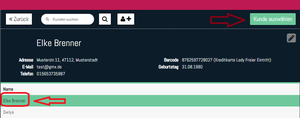
You will now see a search field (Search for Customers).
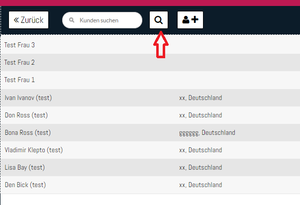
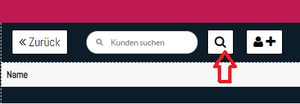
Click on the Magnifying Glass and the following window will open (List of Names).
Now select the Lady from the List of Names to which you would like to assign the Card.
Then press the "Select customer" button.
The prompt "Please scan an RFID card" appears.
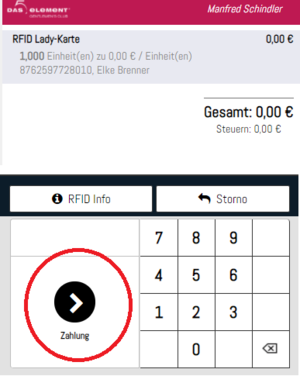
The Free Ladie's Card with €0.00 is now displayed in the checkout field.
Now press payment.
The prompt Payment: 0.00 € please Scan Card appears, please scan the Manager Card.
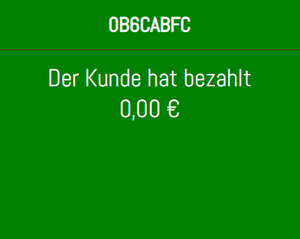
The window "the customer has paid" appears.
_________________________________________________________________________________________________________________________________
Management Cash Register[Bearbeiten | Quelltext bearbeiten]
Product Sale[Bearbeiten | Quelltext bearbeiten]
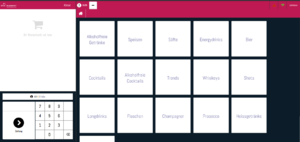
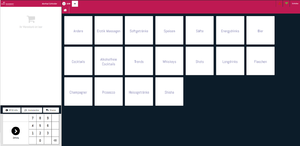
After the loading screen, you will get to the POS interface.
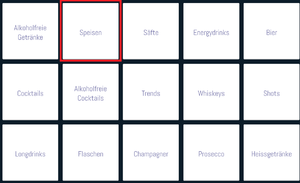
To place an order, first select the product type.
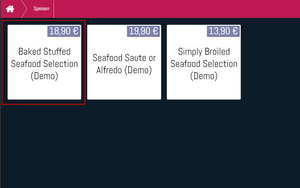
Select the product.
To select products from another category, you need to click on the Home icon.
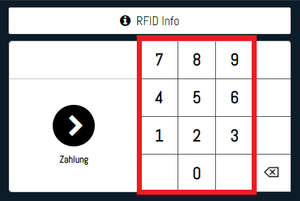
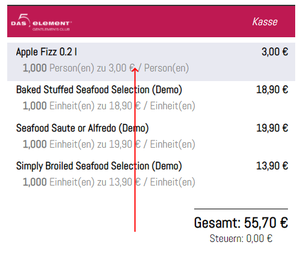
To increase the quantity of a product, you need to click on the product multiple times or change the quantity using the number bar.
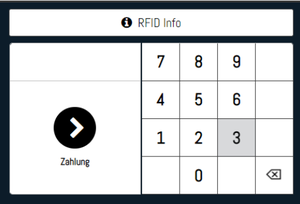
You can also change the quantity of a product already added by highlighting it in the cart and then using the numeric keypad.
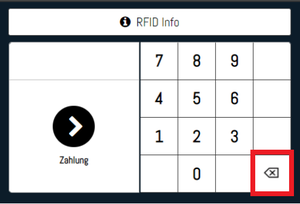
To remove a product from the cart, you must highlight the product and then press the delete key on the numeric keypad twice (pressing once removes only the quantity).
If you want to completely delete the order, repeat the process until the shopping cart is empty.
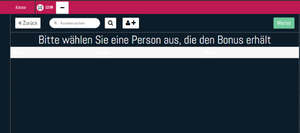
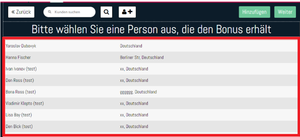
Products in the champagne category have a bonus. When adding such a product, you will be asked to select a person whose account should be credited with the bonus.
To select a person, click the magnifying glass icon or enter a name.
Then select the person who should receive the bonus from the list.
Then please click the "Add" button.
If there is no need to add a bonus, skip this step by clicking the button
Click "Next".
After you have placed an order, you must confirm it.
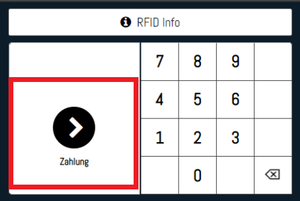
To confirm your order, click the "Payment" button.
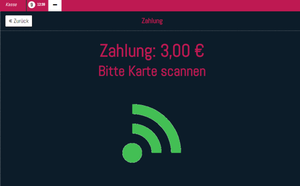
Then please scan a customer card.
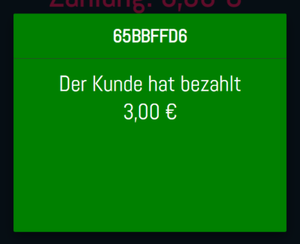
If the order has been created successfully, you will see the following information in window that opens.
Execution of Cancellation[Bearbeiten | Quelltext bearbeiten]
You have opened your cash register and want to make a cancellation.
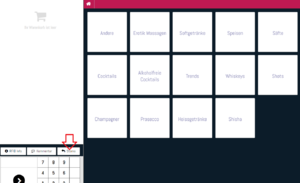
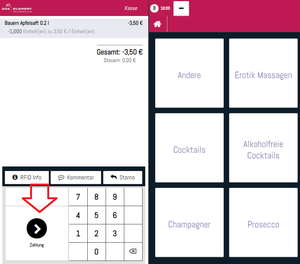
The customer in the example bought an apple juice.
Please click Cancellation.
The following view opens, please click on the magnifying glass.
You will now see all the products from that day that you can cancel.
Please press cancel.
In the next view you will see the product that is to be cancelled.
Please press payment.
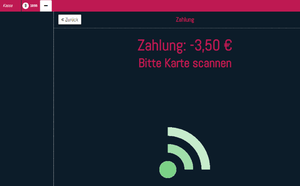
You will now be prompted to scan the card.
Please scan the card on which the product is to be cancelled.
You will now see the following first...
....and immediately afterwards
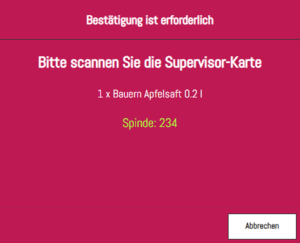
Now please scan the Supervisor-Card.
The process is then complete.
You can check this as follows.
Test 1
Please click Cancellation.
And in the next view again on the magnifying glass.
You will now see that there is no "STORNO" behind the product you just canceled.
Test 2
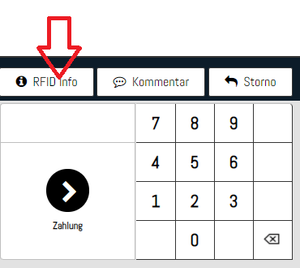
At checkout, click RFID Info.
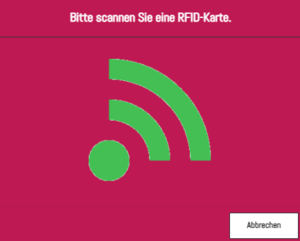
Please scan the RFID card where the amount should be credited again.
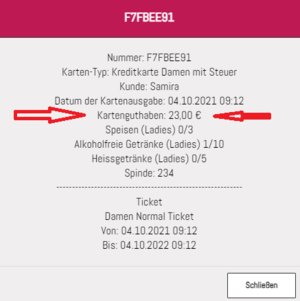
Under Card Balance you can see the amount on the card.
Test 3 (Backend)
You can see in the backend for orders that the €3.50 has been credited back.
Test 4
In the same view you can press the minus amount and then get
in the next view under Type the sales refund is displayed.
Order with locker number(An employee is registered)[Bearbeiten | Quelltext bearbeiten]
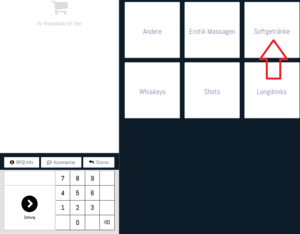
Choose a product (e.g. soft drinks).
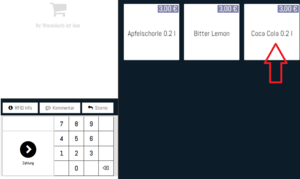
In the next step e.g. Coca Cola
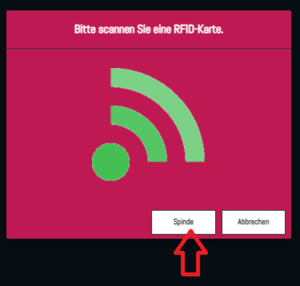
The following pop-up opens.
Click on lockers please.
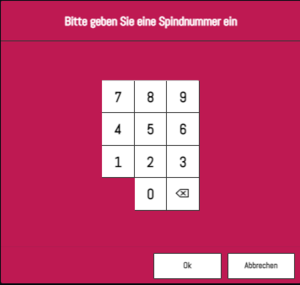
You will now see a number input field
Here you enter the locker number of the customer,
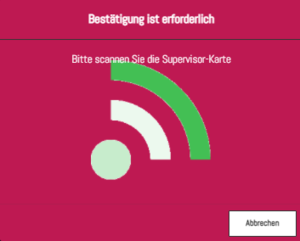
then "Please scan the Supervisor-Card" appears
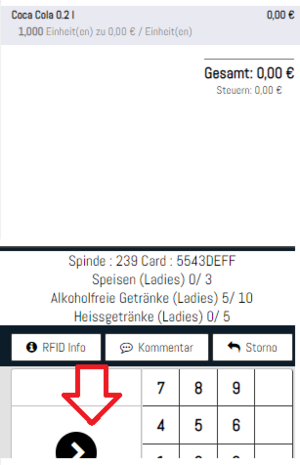
After scanning the Supervisor-Card, you will see the selected product.
Please press payment.
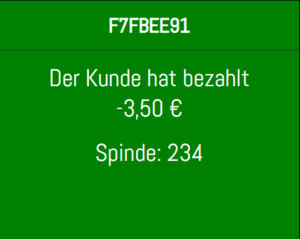
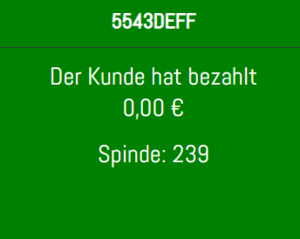
You will now see that the customer has paid.
Order with locker number (A Supervisor/Manager is logged in)[Bearbeiten | Quelltext bearbeiten]
Choose a product (e.g. soft drinks).
In the next step e.g. Coca Cola
The following pop-up opens.
Click on lockers please.
You will now see a number input field
Enter the customer's locker number here
You see the selected product.
Please press payment.
You will now see that the customer has paid.
____________________________________________________________________________________________________________________
Management Employee[Bearbeiten | Quelltext bearbeiten]
Employees can also be managed at the cash register card issue.
RFID Staff Card (Employee- already stored in the list of names)[Bearbeiten | Quelltext bearbeiten]
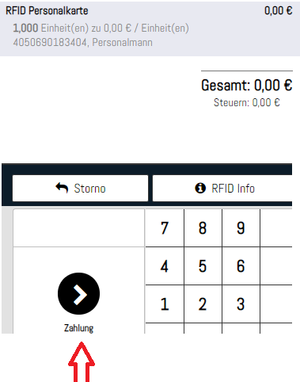
Select the product RFID.
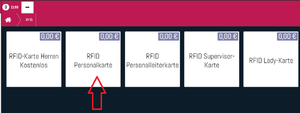
Select the product RFID Staff Card.
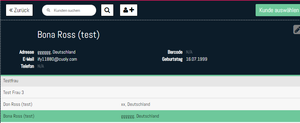
You will now see a search field (search for customers).
If the employee is already registered, click on the magnifying glass
a window with list of names opens.
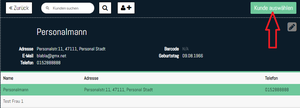
From the list of names, select the employee who should receive the card.
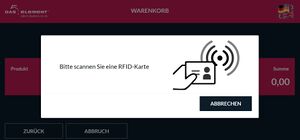
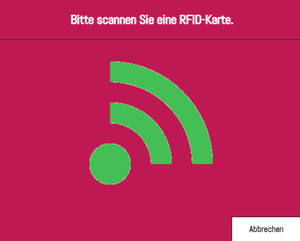
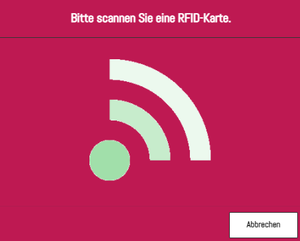
Please scan a new RFID card.
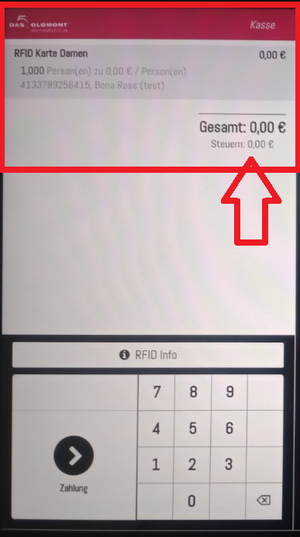
After scanning the card, you will see the selected product on the checkout screen
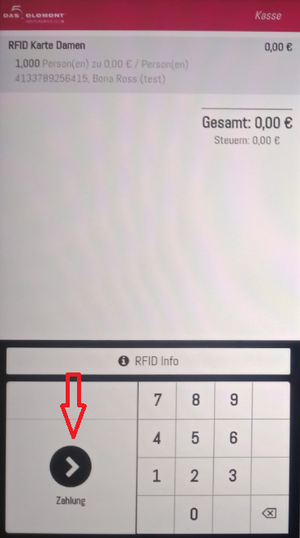
(incl. the content), now press payment.
Please scan the manager card.
The customer has paid.
___________________________________________________________________________________________
RFID Staff Card (Employee has not yet been recorded)[Bearbeiten | Quelltext bearbeiten]
Select the product RFID.
Select the product RFID staff card.
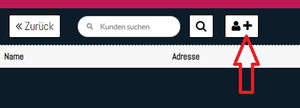
You will now see the following view: (please click on the figure with the + sign).
You will now see the following view: (create the employee here).
After you have filled out all the required fields, please click on Save.
Now click on Select Customer.
Please repeat the steps from the instructions from here.
_________________________________________________________________________________________________________________________________________
Registration Ladies[Bearbeiten | Quelltext bearbeiten]
Registration Flow[Bearbeiten | Quelltext bearbeiten]
Select Register
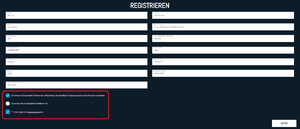
Enter the necessary data, at the end please confirm with CONTINUE.
Please select:
I take part in the Düsseldorf procedure and instruct the operator to pay the daily flat rate to the tax office.
or
I am not taking part in the Düsseldorf procedure.
Do not forget to confirm the terms and conditions and data protection information.
_________________________________________________________________________________________________________________________________________
Lockers Management[Bearbeiten | Quelltext bearbeiten]
Lockers after Inspection and Cleaning by Qualified Staff[Bearbeiten | Quelltext bearbeiten]
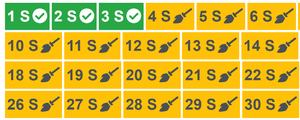
Example:
18 lockers have not been released yet after use by the customer.
3 lockers are already back (green) and released.
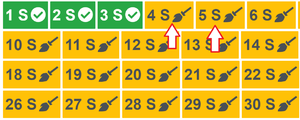
After cleaning and checking, simply left-click the locker number once again
should be released.
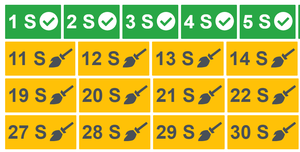
Lockers 4 and 5 after approval by Staff.
_________________________________________________________________________________________________________________________________________________
Backend Administration[Bearbeiten | Quelltext bearbeiten]
In the backend, only tasks can be carried out according to the assigned authorization structure.
Analysis Card Usage[Bearbeiten | Quelltext bearbeiten]
1. Log in the Backend
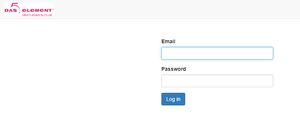
Log in to the backend with the access data you received:
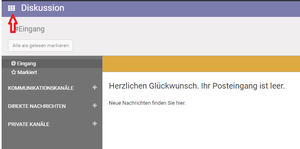
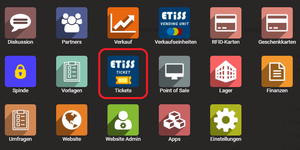
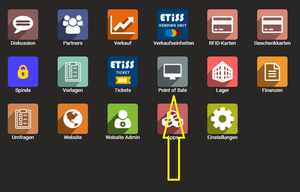
After logging in, the following window opens: Please click on the small tile at the top left.
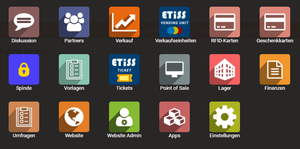
You will now see the following screen: (Selection of the individual functions).
----------------------------------------------------------------------------------------------------------------------------------------------------
2. Product Analysis of a Card (am Beispiel Herren)
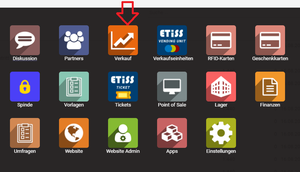
After logging in, you will be shown the screen with the selection of the individual functions.
Click here for sale.
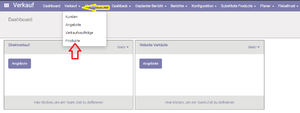
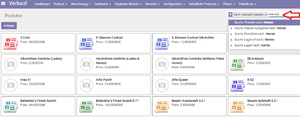
You will now see the Sales view. Open the list under Sales and then click on Products.
You will now be shown the Products view, enter e.g. "men" in the search field.
You will now see all products that contain the word "men" in this view.
In the example, select the product Gentlemen €50.00.
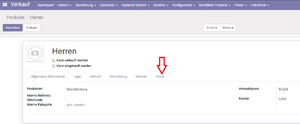
You will now see the Products/Gentlemen view. Please click on Ticket here.
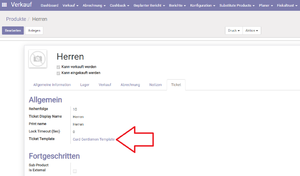
In the next view, please click on Card Gentlemen Template.
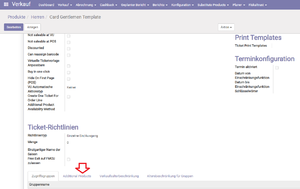
In the view Products/Gentlemen/Card Gentlemen Template, please click on "Additional Products".
You will now see a list of all products on the Gentlemen's card.
---------------------------------------------------------------------------------------------------------------------------------------------------
3. Validity of a Card
Validity of a Ladies or Gentlemen's card. Click Tickets
You will now see the following view "Tickets" - in the list you will see the Product Ladies.
A period of validity under from-to is not displayed because a ladies card remains valid after entry until exit.
Validity of a Gentlemen's Card. Click on tickets as shown above, you will then see the same list.
A Gentlemen's Card is always valid for 24 hours or until the man leaves.
-------------------------------------------------------------------------------------------------------------------------------------------------------
4. Locker Number of a Card
After logging in, you will be shown the screen with the selection of the individual functions.
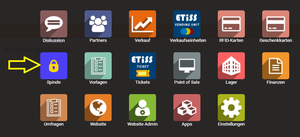
Click here for lockers.
You will now see the Lockers view:
In the view you will see the locker numbers, the condition, the size, the card number and cleaned on, as well as activated or not activated. You can also sort using the individual headings.
-------------------------------------------------------------------------------------------------------------------------------------------------------
5. Disable a Card
After logging in, you will be shown the screen with the selection of the individual functions.
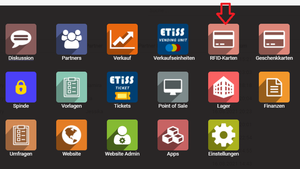
Click here on RFID cards.
You will now see all registered cards. Select the card that should be deactivated here. You can click on the card number, EAN number, type, partner or issue date.
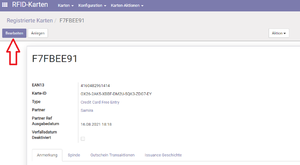
Now you can see the called record, please click here "Edit".
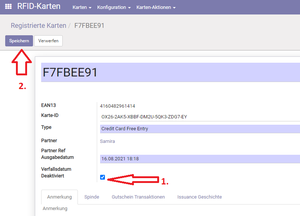
In the next step, please click on "Expiry Date Disabled., and then on "Save".
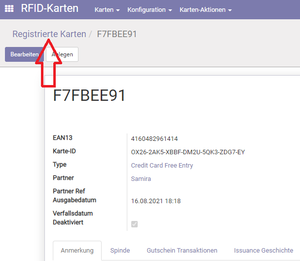
Now the card is deactivated, you can check this with a step back. To do this, please click on "Registered cards"
You will now see a tick in the "Deactivated" column for the data record you had previously selected.
6. If a card is lost (card data transferred to the new card)
_____________________________________________________________________________________________________________________________________
Create Backend POS Product Categories[Bearbeiten | Quelltext bearbeiten]
Sie bekommen nach der Anmeldung das Bild mit der Auswahl der einzelnen Funktionen angezeigt.
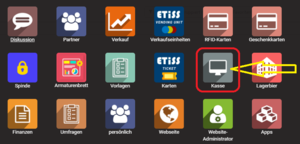
Click here on cash register.
You will now see the Checkout view. Please select POS product categories under configuration.
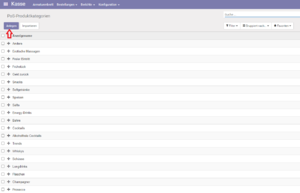
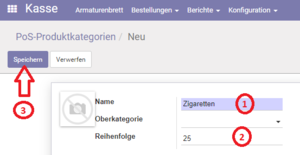
You are now presented the POS product categories view. Please select "Create" at the top left.
In the next window that opens, enter the name of the product category and a number for the order.
- (in the example cigarettes).
- Number/Order
- Save
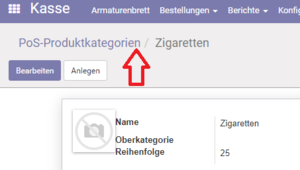
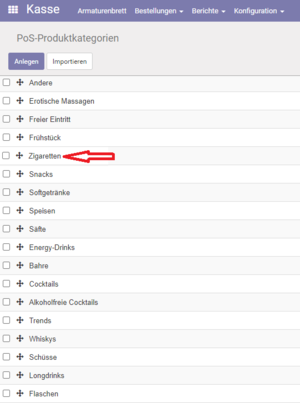
After saving, please select POS product categories.
You will now see the new product Cigarettes in the POS product categories list.
_______________________________________________________________________________________________________________________________________
Delete Backend POS product categories[Bearbeiten | Quelltext bearbeiten]
After logging in, you will be shown the screen with the selection of the individual functions.
Click here on Cash Register.
You will now see the Cash Register view. Please select under configuration, POS product categories.
You are now presented with the POS product categories view.
Here you choose the example of cigarettes again.
The created product is now displayed
You will then see a message again.
Do you really want to delete the record?
If you confirm with OK, the data record is deleted.
Check whether the data record was really deleted.
You select POS product categories again
In the list that is now displayed, the deleted product should be displayed (in the example cigarettes)
can no longer be displayed.
________________________________________________________________________________________________________________________
Produktkategorien anlegenCreate Product Categories[Bearbeiten | Quelltext bearbeiten]
Sie bekommen nach der Anmeldung das Bild mit der Auswahl der einzelnen Funktionen angezeigt.
Klicken Sie hier auf Verkauf.
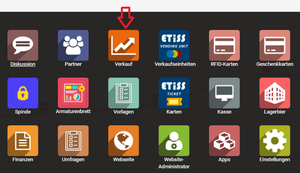
Sie bekommen nun die Ansicht Verkauf angezeigt.
Hier unter Konfiguration die Liste öffnen und dann Produktkategorien anklicken.

Sie bekommen nun die Ansicht Produktkategorien angezeigt.
Hier wählen Sie oben links "Anlegen".
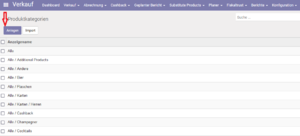 Sie können nun eine neue Produktkategorie anlegen.
(im Beispiel Kondome)
Hierzu gehen Sie wie folgt vor:
- Sie tragen den Kategoriennamen ein.
- Bei Oberkategorie wählen Sie ALLE aus.
- Speichern nicht vergessen.
- Alles andere ist vor eingestellt und muss nicht verändert werden wenn es dazu keinen Anlass gibt.
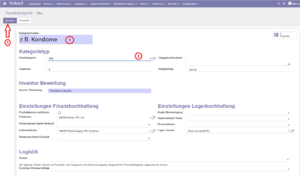 Nach dem Speichern prüfen Sie bitte selbst ob ihre neue Produktkategorie angelegt wurde.
Dazu wählen Sie einfach nach dem Speichern Produktkatgorien.
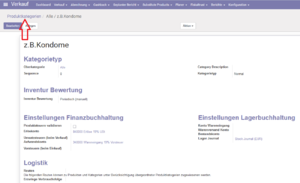
Sie sehen nun am Ende der Liste ihre neu angelegte ProduktkategorieAfter logging in, you will be shown the screen with the selection of the individual functions.
Click here "sale"
You will now see the Sales view.
Open the list here under Configuration and then click on Product Categories
You will now see the Product categories view.
Select "Create" in the top left
You can now create a new product category.
(in the example condoms)
To do this, proceed as follows:
- You enter the category name.
- In the main category, select ALL.
- Don't forget to save.
- Everything else is preset and does not need to be changed if there is no reason to do so.
After saving, please check for yourself whether your new product category has been created.
To do this, simply select Product Categories after saving.
You will now see your new created Product Category at the end of the list.
__________________________________________________________________________________________________________________________
Produktkategorien ändern oder löschenChange or Delete Product Categories[Bearbeiten | Quelltext bearbeiten]
Sie bekommen nach der Anmeldung das Bild mit der Auswahl der einzelnen Funktionen angezeigt.
Klicken Sie hier auf Verkauf.

Sie bekommen nun die Ansicht Verkauf angezeigt.
Hier unter Konfiguration die Liste öffnen und dann Produktkategorien anklicken.

Sie bekommen nun die Ansicht Produktkategorien angezeigt.
Sie wählen einfach die Produktkategorie aus die Sie ändern oder löschen möchten.
(im Beispiel Kondome)
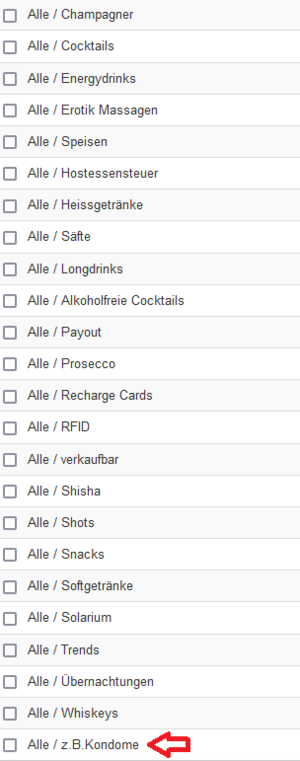 Sie bekommen nun das Bearbeitungsfenster angezeigt (wie schon beim anlegen einer neuen Produktkategorie).
Wenn Sie oben links 1. wählen können Sie die Produktkategorie bearbeiten.
Die Schritte danach sind die gleichen wie beim anlegen einer neuen Produktkategorie
Unter 2. Aktion können Sie die Produktkategorie löschen.
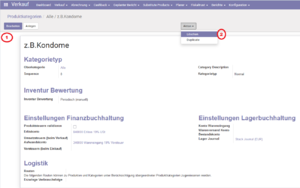 Wenn Sie löschen gewählt haben werden Sie nochmal gefragt ob Sie den Datensatz wirklich löschen möchten.
  Nach der Auswahl OK können Sie wieder selbst prüfen ob die Produktkategorie gelöscht wurde.
Sie wählen dazu einfach oben links wieder Produktkategorien und gelangen so zur Liste.
In der Liste sollte der Eintrag Kondome nun fehlen und wurde somit erfolgreich gelöschtAfter logging in, you will be shown the screen with the selection of the individual functions.
Click here "Sale"
You will now see the Sales view.
Open the list here under Configuration and then click on Product Categories
You will now see the Product categories view.
You simply select the product category that you want to change or delete.
(in the example condoms)
You will now see the editing window (like when creating a new product category).
If you select 1. in the top left, you can edit the product category.
The steps after that are the same as when creating a new product category
Unter 2. Action you can delete the product category.
If you have selected delete, you will be asked again whether you really want to delete the data record.
After selecting OK you can check for yourself whether the product category has been deleted.
To do this, simply select product categories again at the top left and this will take you to the list.
The condoms entry should now be missing from the list and has therefore been successfully deleted.
___________________________________________________________________________________________________________________________
Backend/Produkte anlegen/ hinzufügen und ausblenden, MwSt. Satz eintragenCreate/Add and Hide products[Bearbeiten | Quelltext bearbeiten]
Sie bekommen nach der Anmeldung das Bild mit der Auswahl der einzelnen Funktionen angezeigt.
Klicken Sie hier auf Verkauf.
 Sie bekommen nun die Ansicht Verkauf angezeigt.
Hier unter Verkauf die Liste öffnen und dann Produkte anklicken.
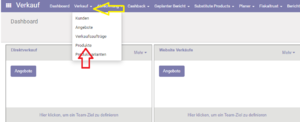 Sie bekommen nun die Ansicht Produkte angezeigt. Hier bitte auf "Anlegen" klicken.
 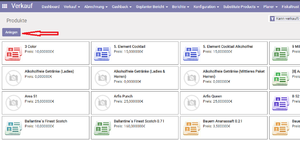 Sie bekommen dann folgende Ansicht angezeigt und können nun hier, neue Produkte hinzufügen, in Kategorien einteilen, die Produktart wählen und den Verkaufspreis festlegen.
Beispiel
Die Felder die ausgefüllt werden müssen sind alles MUSS Felder und KEINE kann Felder!
Gehen Sie bitte Schritt für Schritt vor.....
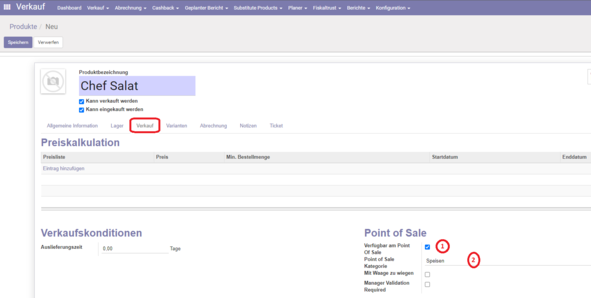
 > Reiter Verkauf < Häkchen bei- Verfügbar am Point Of Sale MUSS gesetzt werden
After logging in, you will be shown the screen with the selection of the individual functions.
Click here for Sale.
You will now see the Sales view.
Open the list under Sales and then click on Products.
You will now see the Products view. Please click on "Create" here.
You will then see the following view and can now add new products, divide them into categories, select the product type and set the sales price.
Example
The fields that have to be filled out are all MUST fields and NONE can fields!
Please proceed step by step.....
- Enter the product name (in the example Chef Salad).
- The checkmark Can be sold MUST be ticked. (if this tick is missing, the product will not be displayed on the POS).
- Checkmark MUST be set for Can be purchased. > Reiter General information tab<
- Product type MUST be selected (service in the example).
- Internal reference MUST be entered (in the example 11).
- Internal category MUST be selected (in the example All/Food).
- Selling price MUST be entered.
> Reiter Sale <
- Checkmark MUST be set at Available at Point Of Sale.
-
Point of Sale Kategorie MUSS eingetragen werden. (im Beispiel, Speisen).
-
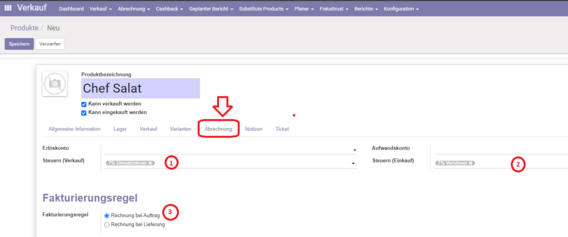
> Im Reiter Abrechnung < (hier wird auch die MwSt. eingetragen oder angepasst)
- Steuern (Verkauf) MUSS die Umsatzsteuer eingetragen werden.
- Steuern (Einkauf) MUSS die Vorsteuer eingetragen werden.
-
Fakturierungsregel- MUSS Rechnung bei Auftrag angeklickt werden.
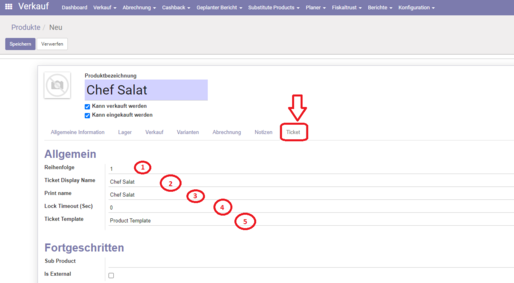
> Reiter Ticket <- Reihenfolge MUSS eingetragen werden.
- Ticket Display Name MUSS eingetragen werden.
- Print Name MUSS eingetragen werden.
- Lock Timeout (Sec) MUSS eingetragen werden.
-
Ticket Template MUSS eingetragen werden.
Am Ende bitte oben links "Speichern" nicht vergessen.
-------------------------------------------------------------------------------------------------------------------------------------------------------
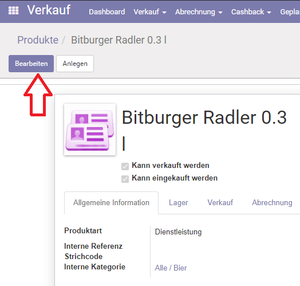
Sie möchten ein Produkt welches Sie nicht mehr verkaufen ausblenden,...gehen Sie bitte wie folgt vor:
Wählen Sie das Produkt welches Sie nicht mehr verkaufen möchten.
Klicken Sie bitte auf das Feld "Bearbeiten".
Dann entfernen Sie bitte den Haken bei "Kann verkauft werden".
Am Ende oben links bitte "Speichern".
_____________________________________________________________________________________________________________________________________
Ersatz- oder neue Produkte hinzufügen[Bearbeiten | Quelltext bearbeiten]
Sie bekommen nach der Anmeldung das Bild mit der Auswahl der einzelnen Funktionen angezeigt.
Klicken Sie hier auf Verkauf.
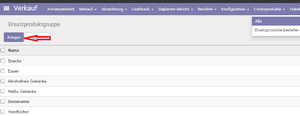
Auf der nächste Seite dem "Armaturenbrett" öffnen Sie bitte Ersatzprodukte- Alle
Sie bekommen nun folgende Liste angezeigt "Ersatzproduktgruppe" klicken Sie bitte auf "Anlegen":
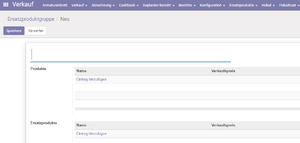
Sie bekommen nun Ersatzproduktgruppe/NEU angezeigt und können hier jetzt ihre Produkte/Ersatzprodukte anlegen.
Am Ende oben links bitte "Speichern".
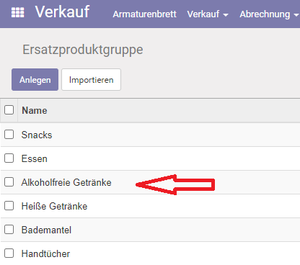
Sie möchten in der Ersatzproduktgruppe schon bestehende Gruppen/Produkte ändern, dann gehen Sie wie folgt vor:
Wählen Sie bitte die Gruppe aus welche Sie ändern möchten indem Sie diese direkt anklicken.
Im nächsten Fenster bitte oben links "Bearbeiten" anklicken, danach können Sie die Gruppe/Produkte bearbeiten.
Nach der Bearbeitung klicken Sie oben links bitte wieder auf "Speichern".
_______________________________________________________________________________________________________________________________________
Produktzuordnung Damen Provision[Bearbeiten | Quelltext bearbeiten]
Sie bekommen nach der Anmeldung das Bild mit der Auswahl der einzelnen Funktionen angezeigt.
Klicken Sie hier auf Verkauf.
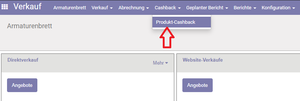
Auf der nächste Seite dem "Armaturenbrett" öffnen Sie bitte unter "Cashback" Produkt-Cashback.
Auf der nächsten Seite "Produkt-Cahsback" klicken Sie bitte auf das Produkt wo Sie den Cashback angezeigt bekommen möchten.
Auf der nächsten Seite klicken Sie auf "Bearbeiten", im Anschluss können Sie die Daten bearbeiten.
Am Ende oben links bitte "Speichern".
_______________________________________________________________________________________________________________________________________
Backend/ Karten Historie[Bearbeiten | Quelltext bearbeiten]
Sie bekommen nach der Anmeldung das Bild mit der Auswahl der einzelnen Funktionen angezeigt.
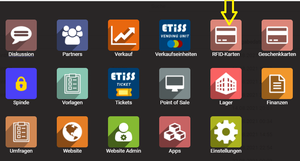
Klicken Sie hier auf RFID-Karten.
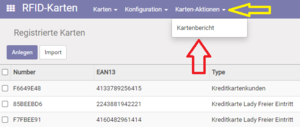
Sie bekommen nun die Registrierte Karten angezeigt. Hier bitte auf " Karten-Aktionen" und im Anschluss auf "Kartenbericht klicken".
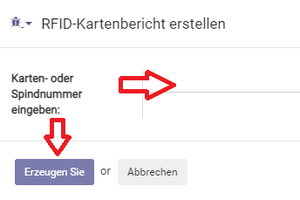
Es öffnet sich RFID-Kartenbericht erstellen, hier geben Sie bitte eine Karten- oder Spind Nummer ein: und klicken im Anschluss auf Erzeugen Sie:
Jetzt bekommen Sie den Bericht angezeigt.
________________________________________________________________________________________________________________________________________________
Backend/Personen anlegen[Bearbeiten | Quelltext bearbeiten]
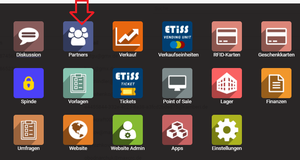
Sie bekommen nach der Anmeldung das Bild mit der Auswahl der einzelnen Funktionen angezeigt.
Klicken Sie hier auf Partners.
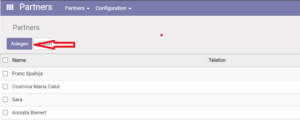
Sie bekommen nun die Liste Partners angezeigt, hier klicken Sie bitte auf "Anlegen".
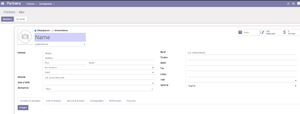
Sie bekommen nun Partner/Neu angezeigt und können jetzt hier die jeweilige Person/Personen anlegen.
Am Ende Speichern oben links bitte nicht vergessen.
Kasse Kartenausgabe "Neue Sitzung" (wenn vorher noch keine geöffnet war).
Im Anschluss sehen Sie das ausgewählte Produkt, bestätigen Sie bitte mit Zahlung:
Nachdem Sie Zahlung angeklickt haben bitte mit der Supervisor Karte bestätigen.
Die Person ist nun im System angelegt.
_________________________________________________________________________________________________________________________________________________
Backend/Personen deaktivieren[Bearbeiten | Quelltext bearbeiten]
Backend/Kassensitzung[Bearbeiten | Quelltext bearbeiten]
Sie bekommen nach der Anmeldung das Bild mit der Auswahl der einzelnen Funktionen angezeigt.
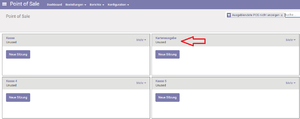
Klicken Sie hier auf Point of Sale (POS).
Sie bekommen nun die Kassen angezeigt.
Je nachdem welche Kasse Sie jetzt öffnen möchten klicken Sie auf der jeweiligen Kasse "Neue Sitzung".
(Beispiel 1, Kasse).
Es öffnet sich die Kasse.
MwSt. Satz eintragen, verändern und anzeigen.[Bearbeiten | Quelltext bearbeiten]
Klicken Sie auf Verkauf.
Öffnen Sie unter Verkauf den Reiter "Konfiguration" und klicken dann bitte auf "Produktkategorien".
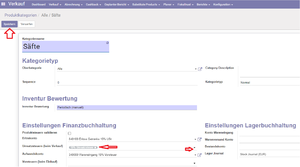
Klicken Sie in der Liste die sich geöffnet hat z.B. auf Alle/Säfte
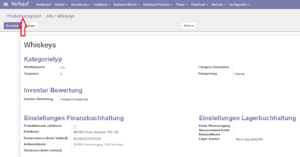
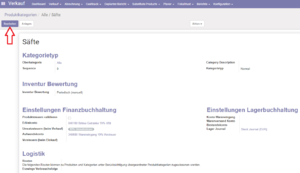
Sie sehen nun das Produkt Säfte und klicken hier bitte auf "Bearbeiten"
Hier können Sie nun die MwSt. bearbeiten, anpassen, ändern.
Bitte am Ende des Vorgangs oben links "Speichern" nicht vergessen.
____________________________________________________________________________________________________________________
Backend/Ticketnutzung[Bearbeiten | Quelltext bearbeiten]
____________________________________________________________________________________________________________________
Backend/Spindnutzung[Bearbeiten | Quelltext bearbeiten]
{{translate|Operating Manual}}
{{DISPLAYTITLE:Operating Manual}}
=='''Operating Manual'''==
===Management Entrance Unit===
'''Day Ticket Gentleman'''
First, press the button Gentleman.
[[Datei:Herren1.png|ohne|mini]]
Make your selection.
[[Datei:Karten Herren.png|ohne|mini]]
Day ticket Gentleman.
Tap on Payment at the bottom right and then select your payment method.
[[Datei:Tageskarte Herren2.png|ohne|mini]]
Select payment method and pay (cash in the example).
[[Datei:Bezahlart Bargeld.png|ohne|mini]]
Payment
[[Datei:Barzahlung.png|ohne|mini]]
'''10er-Card Gentleman'''
Press the button Gentleman.
[[Datei:Herren1.png|ohne|mini]]
Make your selection.
[[Datei:Karten Herren.png|ohne|mini]]
10er Card Gentleman.
Tap on Payment at the bottom right and then select your payment method.
[[Datei:Bezahlung 10er Karte Herren.png|ohne|mini]]
Select payment method and pay (cash in the example).[[Datei:Bezahlart Bargeld.png|ohne|mini]]
Payment
[[Datei:Barzahlung 10erKarte Herren.png|ohne|mini]]
'''Check-In procedure 10 uses Card Gentleman'''
Please scan an RFID card
[[Datei:RFID Karte.png|ohne|mini]]
After scanning the RFID card, the machine shows you a general overview
and its remaining passages. Please press "Payment".
[[Datei:Check In Herren 10er Karte.png|ohne|mini]]
You will now see "Process Completed" and can enter through the gate.
[[Datei:Check IN Herren 10er Karte abgeschlossen.png|ohne|mini]]
'''Check-In procedure Ladies Card'''
Please scan an RFID card
[[Datei:RFID Karte.png|ohne|mini]]
After scanning the RFID card, the machine shows you a general overview,
the total amount to be paid, the products and the validity of the card.
Please press "Payment"
[[Datei:Check in Ladies2.png|ohne|mini]]
And then select a payment method.
[[Datei:Bezahlart wählen2.png|ohne|mini]]
After the payment process you can enter through the gate.
____________________________________________________________________________________________________________________________________________
<br />
===Management Exit Unit===
Please scan an RFID card
[[Datei:VU Ausgang.png|ohne|mini]]
<u>(''in Bearbeitung'').........</u>
__________________________________________________________________________________________________________________________________________
<br />
===Management Cashbox Card Issue===
====POS / RFID - Ladies Card Free Entry====
Press Button Ladies Free Entry.
[[Datei:DamenFreierEintritt1.jpg|ohne|mini]]
Please scan an RFID card.
[[Datei:DamenFreierEintritt2.jpg|ohne|mini]]
Press the Payment Button.
[[Datei:DamenFreierEintritt3.jpg|ohne|mini]]
Process completed.
[[Datei:DamenFreierEintritt4.jpg|ohne|mini]]
<br />
{{Box_Hinweis|Hinweis Text = Any access is only possible with Check-In at the Vending Machine!
1. Check-In at Vending Unit
2. Access through the Gate
3. Only then is it possible to purchase products.}}<br />
====POS / RFID - Card Gentleman Free Entry====
Select the product RFID.
[[Datei:HerrenKartekostenlos1.png|ohne|mini|289x289px]]
Then select the product RFID Card for Gentleman free of Charge.
[[Datei:HerrenKartekostenlos2.png|ohne|mini|290x290px]]
Please scan an RFID card.
[[Datei:HerrenKartekostenlos3.png|ohne|mini]]
The free Gentleman's Card with €0.00 is now displayed in the Checkout Field.
[[Datei:HerrenKartekostenlos4.jpg|ohne|mini]]
Now press payment.
[[Datei:HerrenKartekostenlos5.jpg|ohne|mini]]
The prompt Payment: 0.00 € please scan card appears, now please scan the Master Card.
[[Datei:Bitte scannen Sie die Manager Karte.png|ohne|mini]]
The following window appears (The Customer has paid).[[Datei:Der Kunde hat bezahlt.png|ohne|mini]]
<br />
{{Box_Hinweis|Hinweis Text = Any access is only possible with Check-In at the Vending Machine!
1. Check-in at the Vending Unit
2. Access through the Gate
3. Only then is it possible to purchase products.}}
______________________________________________________________________________________________________________
====POS / RFID - Ladies Card====
Select the product RFID.
[[Datei:DamenKartePOS1.png|ohne|mini]]
Select the product RFID Card Ladies.
[[Datei:DamenKartekostenlosPOS1.png|ohne|mini]]
You will now see a search field (Search for Customers).
[[Datei:DamenKartePOS3.png|ohne|mini]]
Click on the Magnifying Glass and the following window will open (List of Names).
[[Datei:DamenKartePOS4.png|ohne|mini]]
Now select the Lady from the List of Names to which you would like to assign the Card.
[[Datei:DamenKartePOS5.png|ohne|mini]]
Then press the "Select customer" button.
[[Datei:DamenKartePOS6.png|ohne|mini]]
The prompt "Please scan an RFID card" appears.
[[Datei:DamenKartePOS7.png|ohne|mini]]
The Free Ladie's Card with €0.00 is now displayed in the checkout field.
[[Datei:DamenKartePOS8.png|ohne|mini]]
Now press payment.
[[Datei:DamenKartePOS9.png|ohne|mini]]
The prompt Payment: 0.00 € please Scan Card appears,
please scan the Manager Card.
[[Datei:Bitte scannen Sie die Manager Karte.png|ohne|mini]]
The window "the customer has paid" appears.
[[Datei:Der Kunde hat bezahlt.png|ohne|mini]]
_________________________________________________________________________________________________________________________________
===Management Cash Register===
====Product Sale====
After the loading screen, you will get to the POS interface.
[[Datei:POS1.png|ohne|mini]]
To place an order, first select the product type.
[[Datei:pos2.png|ohne|mini]]
Select the product.
[[Datei:pos3.png|ohne|mini]]
To select products from another category, you need to click on the Home icon.
[[Datei:pos4.png|ohne|mini]]
To increase the quantity of a product, you need to click on the product multiple times or change the quantity using the number bar.
[[Datei:pos5.png|ohne|mini]]
You can also change the quantity of a product already added by highlighting it in the cart and then using the numeric keypad.
[[Datei:pos6.png|ohne|mini]]
[[Datei:pos7.png|ohne|mini]]
To remove a product from the cart, you must highlight the product and then press the delete key on the numeric keypad twice (pressing once removes only the quantity).
If you want to completely delete the order, repeat the process until the shopping cart is empty.
[[Datei:pos8.png|ohne|mini]]
Products in the champagne category have a bonus. When adding such a product, you will be asked to select a person whose account should be credited with the bonus.
[[Datei:pos9.png|ohne|mini]]
To select a person, click the magnifying glass icon or enter a name.
[[Datei:pos10.png|ohne|mini]]
Then select the person who should receive the bonus from the list.
[[Datei:pos11.png|ohne|mini]]
Then please click the "Add" button.
[[Datei:pos12.png|ohne|mini]]
If there is no need to add a bonus, skip this step by clicking the button
Click "Next".
[[Datei:pos13.png|ohne|mini]]
After you have placed an order, you must confirm it.
To confirm your order, click the "Payment" button.
[[Datei:pos14.png|ohne|mini]]
Then please scan a customer card.
[[Datei:pos15.png|ohne|mini]]
If the order has been created successfully, you will see the following information in window that opens.
[[Datei:pos16.png|ohne|mini]]
<br />
====Execution of Cancellation====
You have opened your cash register and want to make a cancellation.
The customer in the example bought an apple juice.
Please click Cancellation.
[[Datei:Durchführung Storno3.png|ohne|mini]]
The following view opens, please click on the magnifying glass.
[[Datei:Durchführung Storno4.png|ohne|mini]]
You will now see all the products from that day that you can cancel.
Please press cancel.
[[Datei:Durchführung Storno6.png|ohne|mini]]
In the next view you will see the product that is to be cancelled.
Please press payment.
[[Datei:Durchführung Storno7.png|ohne|mini]]
You will now be prompted to scan the card.
Please scan the card on which the product is to be cancelled.
[[Datei:Durchführung Storno8.png|ohne|mini]]
You will now see the following first...
[[Datei:Durchführung Storno9.png|ohne|mini]]
....and immediately afterwards
[[Datei:Durchführung Storno10.png|ohne|mini]]
Now please scan the Supervisor-Card.
The process is then complete.
You can check this as follows.
Test 1
Please click Cancellation.
And in the next view again on the magnifying glass.
[[Datei:Durchführung Storno3.png|ohne|mini]]
You will now see that there is no "STORNO" behind the product you just canceled.
[[Datei:Durchführung Storno12.png|ohne|mini]]
Test 2
At checkout, click RFID Info.
[[Datei:Durchführung Storno13.png|ohne|mini]]
Please scan the RFID card where the amount should be credited again.
[[Datei:Durchführung Storno14.png|ohne|mini]]
Under Card Balance you can see the amount on the card.
[[Datei:Durchführung Storno15.png|ohne|mini]]
Test 3 (Backend)
You can see in the backend for orders that the €3.50 has been credited back.
[[Datei:Durchführung Storno16.png|ohne|mini]]
Test 4
In the same view you can press the minus amount and then get
in the next view under Type the sales refund is displayed.
[[Datei:Durchführung Storno17.png|ohne|mini]]<br />
====Order with locker number(An employee is registered)====
Choose a product (e.g. soft drinks).
[[Datei:image2.png|ohne|mini]]
In the next step e.g. Coca Cola
[[Datei:image3.png|ohne|mini]]
The following pop-up opens.
Click on lockers please.
[[Datei:image4.png|ohne|mini]]
You will now see a number input field
[[Datei:image5.png|ohne|mini]]
Here you enter the locker number of the customer,
[[Datei:image6.png|ohne|mini]]
then "Please scan the Supervisor-Card" appears
After scanning the Supervisor-Card, you will see the selected product.
Please press payment.
[[Datei:image9.png|ohne|mini]]
You will now see that the customer has paid.
[[Datei:image10.png|ohne|mini]]
====Order with locker number (A Supervisor/Manager is logged in)====
Choose a product (e.g. soft drinks).
[[Datei:image2.png|ohne|mini]]
In the next step e.g. Coca Cola
[[Datei:image3.png|ohne|mini]]
The following pop-up opens.
Click on lockers please.
[[Datei:image4.png|ohne|mini]]
You will now see a number input field
[[Datei:image5.png|ohne|mini]]
Enter the customer's locker number here
You see the selected product.
Please press payment.
[[Datei:image9.png|ohne|mini]]
You will now see that the customer has paid.
[[Datei:image10.png|ohne|mini]]
____________________________________________________________________________________________________________________<span name="Once-you-have-chosen-the-payment-method-please-take-your-credit--or-debit-card-your-change-and-your-receipt-depending-on-the-payment-method-after-the-payment-process"></span>
===Management Employee===
Employees can also be managed at the cash register card issue.
====RFID Staff Card (Employee- already stored in the list of names)====
Select the product RFID.
[[Datei:RFID Herren Karte 1.jpg|ohne|mini]]
Select the product RFID Staff Card.
[[Datei:RFID Personalkarte.png|ohne|mini]]
You will now see a search field (search for customers).
[[Datei:DamenKartePOS3.png|ohne|mini]]
If the employee is already registered, click on the magnifying glass
a window with list of names opens.
[[Datei:DamenKartePOS4.png|ohne|mini]]
From the list of names, select the employee who should receive the card.
[[Datei:Kunde auswählen.png|mini|ohne]]
Please scan a new RFID card.
[[Datei:Bitte scannen Sie eine RFID-Karte.png|ohne|mini]]
After scanning the card, you will see the selected product on the checkout screen
(incl. the content), now press payment.
[[Datei:Personalkarte bezahlen.png|ohne|mini]]
Please scan the manager card.
[[Datei:Bitte scannen Sie die Manager Karte.png|ohne|mini]]
The customer has paid.
[[Datei:Der Kunde hat bezahlt.png|ohne|mini]]
___________________________________________________________________________________________
====RFID Staff Card (Employee has not yet been recorded)====
Select the product RFID.
[[Datei:RFID Herren Karte 1.jpg|ohne|mini]]
Select the product RFID staff card.
[[Datei:RFID Personalkarte.png|ohne|mini]]
You will now see the following view: (please click on the figure with the + sign).
[[Datei:Mitarbeiter anlegen.png|ohne|mini]]
You will now see the following view: (create the employee here).
[[Datei:Mitarbeiter anlegen2.png|ohne|mini]]
After you have filled out all the required fields, please click on Save.
[[Datei:Mitarbeiter anlegen3.png|ohne|mini]]
Now click on Select Customer.
[[Datei:Mitarbeiter anlegen4.png|ohne|mini]]
Please repeat the steps from the instructions from here.
<br />
{{Box_Hinweis|Hinweis Text = The individual steps are repeated for all other RFID staff cards ( Manager Card, Supervisor und Lady-Card) }}
_________________________________________________________________________________________________________________________________________
===Registration Ladies===
====Registration Flow====
Select '''Register'''
[[Datei:Registrieren auf dem Tablet.png|ohne|mini]]
Enter the necessary data, at the end please confirm with CONTINUE.
Please select:
I take part in the Düsseldorf procedure and instruct the operator to pay the daily flat rate to the tax office.
or
I am not taking part in the Düsseldorf procedure.
Do not forget to confirm the terms and conditions and data protection information.
[[Datei:Registrieren auf dem Tablet2.png|ohne|mini]]
_________________________________________________________________________________________________________________________________________
===Lockers Management===
====Lockers after Inspection and Cleaning by Qualified Staff====
'''Example:'''
18 lockers have not been released yet after use by the customer.
3 lockers are already back (green) and released.
[[Datei:spinde1.png|ohne|mini]]
After cleaning and checking, simply left-click the locker number once again
should be released.
[[Datei:spinde2.png|ohne|mini]]
Lockers 4 and 5 after approval by Staff.
[[Datei:spinde3.png|ohne|mini]]
_________________________________________________________________________________________________________________________________________________
===Backend Administration===
In the backend, only tasks can be carried out according to the assigned authorization structure.
====Analysis Card Usage====
'''1. Log in the Backend'''
Log in to the backend with the access data you received:
[[Datei:AnmeldungBackend.png|ohne|mini]]
After logging in, the following window opens: Please click on the small tile at the top left.
[[Datei:AnmeldungBackend1.png|ohne|mini]]
You will now see the following screen: (Selection of the individual functions).
[[Datei:BackendnachAnmeldung.png|ohne|mini]]
<nowiki>----------------------------------------------------------------------------------------------------------------------------------------------------</nowiki>
'''2. Product Analysis of a Card (am Beispiel Herren)'''
After logging in, you will be shown the screen with the selection of the individual functions.
Click here for sale.
[[Datei:ProdukteVerkauf.png|ohne|mini]]
You will now see the Sales view. Open the list under Sales and then click on Products.
[[Datei:ProdukteVerkauf2.png|ohne|mini]]
You will now be shown the Products view, enter e.g. "men" in the search field.
[[Datei:ProdukteKarteBeispielHerren.png|ohne|mini]]
You will now see all products that contain the word "men" in this view.
In the example, select the product Gentlemen €50.00.
[[Datei:Herren50€.png|ohne|mini]]
You will now see the Products/Gentlemen view. Please click on Ticket here.
[[Datei:Herren50€ 2.png|ohne|mini]]
In the next view, please click on Card Gentlemen Template.
[[Datei:Herren50€ 3.png|ohne|mini]]
In the view Products/Gentlemen/Card Gentlemen Template, please click on "Additional Products".
[[Datei:Herren50€ 4.png|ohne|mini]]
You will now see a list of all products on the Gentlemen's card.
[[Datei:Herren50€ 5.png|ohne|mini]]
<nowiki>---------------------------------------------------------------------------------------------------------------------------------------------------</nowiki>
'''3. Validity of a Card'''
Validity of a Ladies or Gentlemen's card. Click Tickets
[[Datei:GültigkeitTicket1.png|ohne|mini]]
You will now see the following view "Tickets" - in the list you will see the Product Ladies.
A period of validity under from-to is not displayed because a ladies card remains valid after entry until exit.
[[Datei:GültigkeitTicket2Damen.png|ohne|mini]]
Validity of a Gentlemen's Card. Click on tickets as shown above, you will then see the same list.
A Gentlemen's Card is always valid for 24 hours or until the man leaves.
[[Datei:GültigkeitTicket2Herren.png|ohne|mini]]
<nowiki>-------------------------------------------------------------------------------------------------------------------------------------------------------</nowiki>
'''4. Locker Number of a Card'''
After logging in, you will be shown the screen with the selection of the individual functions.
Click here for lockers.
[[Datei:SpindeBackend.png|ohne|mini]]
You will now see the Lockers view:
In the view you will see the locker numbers, the condition, the size, the card number and cleaned on, as well as activated or not activated. You can also sort using the individual headings.
[[Datei:AnsichtSpinde.png|ohne|mini]]
<nowiki>-------------------------------------------------------------------------------------------------------------------------------------------------------</nowiki>
'''5. Disable a Card'''
After logging in, you will be shown the screen with the selection of the individual functions.
Click here on RFID cards.
[[Datei:Lady Karte deaktivieren.png|ohne|mini]]
You will now see all registered cards. Select the card that should be deactivated here.
You can click on the card number, EAN number, type, partner or issue date.
[[Datei:Karte deaktivieren1.png|ohne|mini]]
Now you can see the called record, please click here '''"Edit"'''.
[[Datei:Karte deaktivieren2.png|ohne|mini]]
In the next step, please click on '''"Expiry Date Disabled'''., and then on "'''Save'''".
[[Datei:Karte deaktivieren2a.png|ohne|mini]]
Now the card is deactivated, you can check this with a step back.
To do this, please click on "'''Registered cards'''"
[[Datei:Karte deaktivieren4.png|ohne|mini]]
You will now see a tick in the "Deactivated" column for the data record you had previously selected.
[[Datei:Karte deaktivieren5.png|ohne|mini]]
'''6. If a card is lost (card data transferred to the new card)'''
_____________________________________________________________________________________________________________________________________
====Create Backend POS Product Categories====
Sie bekommen nach der Anmeldung das Bild mit der Auswahl der einzelnen Funktionen angezeigt.
Click here on cash register.
[[Datei:image17.png|ohne|mini]]
You will now see the Checkout view. Please select '''POS product categories''' under configuration.
[[Datei:image18.png|ohne|mini]]
You are now presented the POS product categories view. Please select '''"Create"''' at the top left.
[[Datei:image19.png|ohne|mini]]
In the next window that opens, enter the name of the product category and a number for the order.
#(in the example cigarettes).
#Number/Order
#Save
[[Datei:image20.png|ohne|mini]]
After saving, please select '''POS product categories.'''
[[Datei:image21.png|ohne|mini]]
You will now see the new product Cigarettes in the POS product categories list.
[[Datei:image22.png|ohne|mini]]
<br />{{Box_Hinweis|Hinweis Text = If you have changed, added or deleted something in the products, please RESTART the POS after the changes, otherwise your changes will not be transferred to the POS. }}_______________________________________________________________________________________________________________________________________
====Delete Backend POS product categories====
After logging in, you will be shown the screen with the selection of the individual functions.
Click here on Cash Register.
[[Datei:image17.png|ohne|mini]]
You will now see the Cash Register view. Please select under configuration, '''POS product categories'''.
[[Datei:image18.png|ohne|mini]]
You are now presented with the POS product categories view.
Here you choose the example of cigarettes again.
[[Datei:image22.png|ohne|mini]]
The created product is now displayed
[[Datei:image23.png|ohne|mini]]
You will then see a message again.
Do you really want to delete the record?
If you confirm with OK, the data record is deleted.
[[Datei:image24.png|ohne|mini]]
Check whether the data record was really deleted.
You select '''POS product categories''' again
[[Datei:image25.png|ohne|mini]]
'''In the list that is now displayed, the deleted product should be displayed (in the example cigarettes)'''
'''can no longer be displayed.'''
________________________________________________________________________________________________________________________
====Produktkategorien anlegen====
Sie bekommen nach der Anmeldung das Bild mit der Auswahl der einzelnen Funktionen angezeigt.
Klicken Sie hier auf Verkauf.Create Product Categories====
After logging in, you will be shown the screen with the selection of the individual functions.
Click here "sale"
[[Datei:Verkauf.png|ohne|mini]]
Sie bekommen nun die Ansicht Verkauf angezeigt.
Hier unter Konfiguration die Liste öffnen und dann '''Produktkategorien''' anklicken.
You will now see the Sales view.
Open the list here under Configuration and then click on '''Product Categories'''
[[Datei:image26.png|ohne|mini]]
Sie bekommen nun die Ansicht Produktkategorien angezeigt.
Hier wählen Sie oben links "Anlegen".You will now see the Product categories view.
Select "Create" in the top left
[[Datei:image27.png|ohne|mini]]
Sie können nun eine neue Produktkategorie anlegen.
(im Beispiel Kondome)
Hierzu gehen Sie wie folgt vor:
#Sie tragen den Kategoriennamen ein.
#Bei Oberkategorie wählen Sie ALLE aus.
#Speichern nicht vergessen.
#Alles andere ist vor eingestellt und muss nicht verändert werden wenn es dazu keinen Anlass gibtYou can now create a new product category.
(in the example condoms)
To do this, proceed as follows:
#You enter the category name.
#In the main category, select ALL.
#Don't forget to save.
#Everything else is preset and does not need to be changed if there is no reason to do so.
[[Datei:image29.png|ohne|mini]]
Nach dem Speichern prüfen Sie bitte selbst ob ihre neue Produktkategorie angelegt wurde.
Dazu wählen Sie einfach nach dem Speichern '''Produktkatgorien'''After saving, please check for yourself whether your new product category has been created.
To do this, simply select '''Product Categories''' after saving.
[[Datei:image30.png|ohne|mini]]
Sie sehen nun am Ende der Liste ihre neu angelegte ProduktkategorieYou will now see your new created Product Category at the end of the list.
[[Datei:image31.png|ohne|mini]]
__________________________________________________________________________________________________________________________
====Produktkategorien ändern oder löschen====
Sie bekommen nach der Anmeldung das Bild mit der Auswahl der einzelnen Funktionen angezeigt.
Klicken Sie hier auf Verkauf.Change or Delete Product Categories====
After logging in, you will be shown the screen with the selection of the individual functions.
Click here "Sale"
[[Datei:Verkauf.png|ohne|mini]]
Sie bekommen nun die Ansicht Verkauf angezeigt.
Hier unter Konfiguration die Liste öffnen und dann '''Produktkategorien''' anklicken.
You will now see the Sales view.
Open the list here under Configuration and then click on '''Product Categories'''
[[Datei:image26.png|ohne|mini]]
Sie bekommen nun die Ansicht Produktkategorien angezeigt.
Sie wählen einfach die Produktkategorie aus die Sie ändern oder löschen möchten.
(im Beispiel KondomeYou will now see the Product categories view.
You simply select the product category that you want to change or delete.
(in the example condoms)
[[Datei:image31.png|ohne|mini]]
Sie bekommen nun das Bearbeitungsfenster angezeigt (wie schon beim anlegen einer neuen Produktkategorie).
Wenn Sie oben links 1. wählen können Sie die Produktkategorie bearbeiten.
Die Schritte danach sind die gleichen wie beim anlegen einer neuen Produktkategorie
Unter 2. Aktion können Sie die Produktkategorie löschenYou will now see the editing window (like when creating a new product category).
If you select 1. in the top left, you can edit the product category.
The steps after that are the same as when creating a new product category
Unter 2. Action you can delete the product category.
[[Datei:image32.png|ohne|mini]]
Wenn Sie löschen gewählt haben werden Sie nochmal gefragt ob Sie den Datensatz wirklich löschen möchtenIf you have selected delete, you will be asked again whether you really want to delete the data record.
[[Datei:image33.png|ohne|mini]]
Nach der Auswahl '''OK''' können Sie wieder selbst prüfen ob die Produktkategorie gelöscht wurde.
Sie wählen dazu einfach oben links wieder Produktkategorien und gelangen so zur Liste.
In der Liste sollte der Eintrag Kondome nun fehlen und wurde somit erfolgreich gelöschtAfter selecting '''OK''' you can check for yourself whether the product category has been deleted.
To do this, simply select product categories again at the top left and this will take you to the list.
The condoms entry should now be missing from the list and has therefore been successfully deleted.
[[Datei:image34.png|ohne|mini]]
___________________________________________________________________________________________________________________________
====Backend/Produkte anlegen/ hinzufügen und ausblenden, MwSt. Satz eintragen====
Sie bekommen nach der Anmeldung das Bild mit der Auswahl der einzelnen Funktionen angezeigt.
Klicken Sie hier auf Verkauf.
Create/Add and Hide products====
After logging in, you will be shown the screen with the selection of the individual functions.
Click here for Sale.[[Datei:Verkauf.png|ohne|mini]]
Sie bekommen nun die Ansicht Verkauf angezeigt.
Hier unter Verkauf die Liste öffnen und dann '''Produkte''' anklickenYou will now see the Sales view.
Open the list under Sales and then click on '''Products'''.
[[Datei:image11.png|ohne|mini]]
Sie bekommen nun die Ansicht Produkte angezeigt. Hier bitte auf "'''Anlegen'''" klickenYou will now see the Products view. Please click on "'''Create'''" here.
[[Datei:ProdukteVerkauf3.png|ohne|mini]]
Sie bekommen dann folgende Ansicht angezeigt und können nun hier, neue Produkte hinzufügen, in Kategorien einteilen, die Produktart wählen und den Verkaufspreis festlegen.
'''Beispiel'''
Die Felder die ausgefüllt werden müssen sind alles '''MUSS''' Felder und '''KEINE''' kann Felder!
Gehen Sie bitte Schritt für Schritt vor.....
#Produktbezeichnung eintragen (im Beispiel Chef Salat).
#Häkchen bei- Kann verkauft werden '''MUSS''' gesetzt sein. ''(<u>fehlt dieses Häkchen wird das Produkt nicht auf dem POS angezeig</u>t).''
#Häkchen bei- Kann eingekauft werden '''MUSS''' gesetzt sein. <u>> Reiter Allgemeine Informationen <</u>
#Produktart '''MUSS''' ausgewählt werden (im Beispiel Dienstleistung).
#Interne Referenz '''MUSS''' eingetragen werden (im Beispiel 11).
#Interne Kategorie '''MUSS''' ausgewählt werden (im Beispiel Alle/Speisen).
#Verkaufspreis '''MUSS''' eingetragen werdenYou will then see the following view and can now add new products, divide them into categories, select the product type and set the sales price.
'''Example'''
The fields that have to be filled out are all '''MUST''' fields and '''NONE''' can fields!
Please proceed step by step.....
#Enter the product name (in the example Chef Salad).
#The checkmark Can be sold '''MUST''' be ticked. (if this tick is missing, the product will not be displayed on the POS).
#Checkmark '''MUST''' be set for Can be purchased. <u>> Reiter General information tab<</u>
#Product type '''MUST''' be selected (service in the example).
#Internal reference '''MUST''' be entered (in the example 11).
#Internal category '''MUST''' be selected (in the example All/Food).
#Selling price '''MUST''' be entered.[[Datei:image12.png|ohne|mini|627x627px]]
<u>> Reiter VerkaufSale <</u>
#Häkchen bei- Verfügbar am Point Of Sale '''MUSS''' gesetzt werden#Checkmark '''MUST''' be set at Available at Point Of Sale.
#Point of Sale Kategorie '''MUSS''' eingetragen werden. (im Beispiel, Speisen).[[Datei:image14.png|ohne|mini|591x591px]]<br />
#<u>> Im Reiter Abrechnung < (''hier wird auch die MwSt. eingetragen oder angepasst'')</u>
##Steuern (Verkauf) '''MUSS''' die Umsatzsteuer eingetragen werden.
##Steuern (Einkauf) '''MUSS''' die Vorsteuer eingetragen werden.
##Fakturierungsregel- '''MUSS''' Rechnung bei Auftrag angeklickt werden.[[Datei:image15.png|ohne|mini|568x568px]]<br /><u>> Reiter Ticket <</u>
###Reihenfolge '''MUSS''' eingetragen werden.
###Ticket Display Name '''MUSS''' eingetragen werden.
###Print Name '''MUSS''' eingetragen werden.
###Lock Timeout (Sec) '''MUSS''' eingetragen werden.
###Ticket Template '''MUSS''' eingetragen werden.[[Datei:image16.png|ohne|mini|514x514px]]<br />
'''Am Ende bitte oben links "Speichern" nicht vergessen.'''
{{Box_Hinweis|Hinweis Text = Wenn Sie bei den Produkten etwas verändert, hinzugefügt oder gelöscht haben müssen Sie bitte das POS nach den Veränderungen NEU STARTEN , da ihre Änderungen sonst nicht an das POS übertragen werden. }}
<nowiki>-------------------------------------------------------------------------------------------------------------------------------------------------------</nowiki>
Sie möchten ein Produkt welches Sie nicht mehr verkaufen ausblenden,...gehen Sie bitte wie folgt vor:
Wählen Sie das Produkt welches Sie nicht mehr verkaufen möchten.
[[Datei:Produkt ausblenden.png|ohne|mini]]
Klicken Sie bitte auf das Feld "Bearbeiten".
[[Datei:Produkt ausblenden1.png|ohne|mini]]
Dann entfernen Sie bitte den Haken bei "Kann verkauft werden".
[[Datei:Produkt ausblenden2.png|ohne|mini]]
'''Am Ende oben links bitte "Speichern".'''
_____________________________________________________________________________________________________________________________________
====Ersatz- oder neue Produkte hinzufügen====
Sie bekommen nach der Anmeldung das Bild mit der Auswahl der einzelnen Funktionen angezeigt.
Klicken Sie hier auf Verkauf.
[[Datei:Verkauf.png|ohne|mini]]
Auf der nächste Seite dem "Armaturenbrett" öffnen Sie bitte Ersatzprodukte- Alle
[[Datei:Ersatzprodukte.png|ohne|mini]]
Sie bekommen nun folgende Liste angezeigt "Ersatzproduktgruppe" klicken Sie bitte auf "Anlegen":
[[Datei:Ersatzproduktgruppe.png|ohne|mini]]
Sie bekommen nun Ersatzproduktgruppe/NEU angezeigt und können hier jetzt ihre Produkte/Ersatzprodukte anlegen.
[[Datei:ErsatzproduktgruppeNEU.png|ohne|mini]]
'''Am Ende oben links bitte "Speichern".'''
Sie möchten in der Ersatzproduktgruppe schon bestehende Gruppen/Produkte ändern, dann gehen Sie wie folgt vor:
Wählen Sie bitte die Gruppe aus welche Sie ändern möchten indem Sie diese direkt anklicken.
[[Datei:Ersatzproduktgruppe ändern.png|ohne|mini]]
Im nächsten Fenster bitte oben links "Bearbeiten" anklicken, danach können Sie die Gruppe/Produkte bearbeiten.
Nach der Bearbeitung klicken Sie oben links bitte wieder auf "Speichern".
_______________________________________________________________________________________________________________________________________
====Produktzuordnung Damen Provision====
Sie bekommen nach der Anmeldung das Bild mit der Auswahl der einzelnen Funktionen angezeigt.
Klicken Sie hier auf Verkauf.
[[Datei:Verkauf.png|ohne|mini]]
Auf der nächste Seite dem "Armaturenbrett" öffnen Sie bitte unter "Cashback" Produkt-Cashback.
[[Datei:Armaturenbrett.png|ohne|mini]]
Auf der nächsten Seite "Produkt-Cahsback" klicken Sie bitte auf das Produkt wo Sie den Cashback angezeigt bekommen möchten.
[[Datei:Produkt Cashback2.png|ohne|mini]]
Auf der nächsten Seite klicken Sie auf "Bearbeiten", im Anschluss können Sie die Daten bearbeiten.
[[Datei:Produkt Cashback3.png|ohne|mini]]
'''Am Ende oben links bitte "Speichern".'''
_______________________________________________________________________________________________________________________________________
====Backend/ Karten Historie====
Sie bekommen nach der Anmeldung das Bild mit der Auswahl der einzelnen Funktionen angezeigt.
Klicken Sie hier auf RFID-Karten.
[[Datei:Karten Historie1a.png|ohne|mini]]
Sie bekommen nun die Registrierte Karten angezeigt. Hier bitte auf " '''Karten-Aktionen'''" und im Anschluss auf "'''Kartenbericht klicken'''".
[[Datei:Karten Historie2a.png|ohne|mini]]
Es öffnet sich RFID-Kartenbericht erstellen, hier geben Sie bitte eine Karten- oder Spind Nummer ein: und klicken im Anschluss auf Erzeugen Sie:
[[Datei:Karten Historie3.png|ohne|mini]]
Jetzt bekommen Sie den Bericht angezeigt.
[[Datei:Karten HistorieBericht.png|ohne|mini]]
________________________________________________________________________________________________________________________________________________<br />
====Backend/Personen anlegen====
Sie bekommen nach der Anmeldung das Bild mit der Auswahl der einzelnen Funktionen angezeigt.
Klicken Sie hier auf Partners.
[[Datei:Mitarbeiteranlegenbackend.png|ohne|mini]]
Sie bekommen nun die Liste Partners angezeigt, hier klicken Sie bitte auf "'''Anlegen'''".
[[Datei:Mitarbeiteranlegenbackend1.png|ohne|mini]]
Sie bekommen nun Partner/Neu angezeigt und können jetzt hier die jeweilige Person/Personen anlegen.
[[Datei:Mitarbeiteranlegenbackend2.png|ohne|mini]]
Am Ende Speichern oben links bitte nicht vergessen.
Im nächsten Schritt öffnen Sie bitte eine Kassensitzung '''"KARTENAUSGABE'''".[[Datei:BackendPOS1.png|ohne|mini]]
Kasse Kartenausgabe "'''Neue Sitzung'''" (wenn vorher noch keine geöffnet war).
[[Datei:Kasse Kartenausgabe.png|ohne|mini]]
[[Datei:RFID Karte Personal.png|ohne|mini]]
[[Datei:RFID Lady Karte.png|ohne|mini|309x309px]]
<br />
[[Datei:Lady anlegen.png|ohne|mini]]
<br />
[[Datei:Elke Brenner anlegen.png|ohne|mini]]
Bitte scannen Sie eine neue RFID Karte.[[Datei:Bitte scannen Sie eine RFID-Karte.png|ohne|mini]]
Im Anschluss sehen Sie das ausgewählte Produkt, bestätigen Sie bitte mit Zahlung:
[[Datei:Lady Karte Kasse x.png|ohne|mini]]
Nachdem Sie Zahlung angeklickt haben bitte mit der Supervisor Karte bestätigen.
[[Datei:Bitte scannen Sie die Manager Karte.png|ohne|mini]]
Die Person ist nun im System angelegt.
[[Datei:Der Kunde hat bezahlt.png|ohne|mini]]
_________________________________________________________________________________________________________________________________________________
====Backend/Personen deaktivieren====
<br />
====Backend/Kassensitzung====
Sie bekommen nach der Anmeldung das Bild mit der Auswahl der einzelnen Funktionen angezeigt.
Klicken Sie hier auf Point of Sale (POS).
[[Datei:BackendPOS1.png|ohne|mini]]
Sie bekommen nun die Kassen angezeigt.
Je nachdem welche Kasse Sie jetzt öffnen möchten klicken Sie auf der jeweiligen Kasse "'''Neue Sitzung'''".
(Beispiel 1, Kasse).
[[Datei:BackendPOS2 - Kopie.png|ohne|mini]]
Es öffnet sich die Kasse.
[[Datei:BackendPOS3.png|ohne|mini]]
<br />
===MwSt. Satz eintragen, verändern und anzeigen.===
Klicken Sie auf Verkauf.[[Datei:Verkauf.png|ohne|mini]]
Öffnen Sie unter Verkauf den Reiter "Konfiguration" und klicken dann bitte auf "Produktkategorien".
[[Datei:MwSt.png|ohne|mini]]
Klicken Sie in der Liste die sich geöffnet hat z.B. auf Alle/Säfte
[[Datei:Produktkategorien1.png|ohne|mini]]
Sie sehen nun das Produkt Säfte und klicken hier bitte auf "Bearbeiten"
[[Datei:Säfte.png|ohne|mini]]
Hier können Sie nun die MwSt. bearbeiten, anpassen, ändern.
[[Datei:Steuer bearbeiten.png|ohne|mini]]
Bitte am Ende des Vorgangs oben links "Speichern" nicht vergessen.
____________________________________________________________________________________________________________________<br />
===Backend/Ticketnutzung===
____________________________________________________________________________________________________________________
===Backend/Spindnutzung===
{{Links | Thema1 = }}
[[Kategorie:Kamberi Group EN]]| (3 dazwischenliegende Versionen desselben Benutzers werden nicht angezeigt) | |||
| Zeile 752: | Zeile 752: | ||
________________________________________________________________________________________________________________________ | ________________________________________________________________________________________________________________________ | ||
| − | ==== | + | ====Create Product Categories==== |
| − | + | After logging in, you will be shown the screen with the selection of the individual functions. | |
| − | + | Click here "sale" | |
[[Datei:Verkauf.png|ohne|mini]] | [[Datei:Verkauf.png|ohne|mini]] | ||
| − | + | You will now see the Sales view. | |
| − | + | Open the list here under Configuration and then click on '''Product Categories''' | |
[[Datei:image26.png|ohne|mini]] | [[Datei:image26.png|ohne|mini]] | ||
| − | + | You will now see the Product categories view. | |
| − | + | Select "Create" in the top left | |
[[Datei:image27.png|ohne|mini]] | [[Datei:image27.png|ohne|mini]] | ||
| − | + | You can now create a new product category. | |
| − | ( | + | (in the example condoms) |
| − | + | To do this, proceed as follows: | |
| − | # | + | #You enter the category name. |
| − | # | + | #In the main category, select ALL. |
| − | # | + | #Don't forget to save. |
| − | # | + | #Everything else is preset and does not need to be changed if there is no reason to do so. |
[[Datei:image29.png|ohne|mini]] | [[Datei:image29.png|ohne|mini]] | ||
| − | + | After saving, please check for yourself whether your new product category has been created. | |
| − | + | To do this, simply select '''Product Categories''' after saving. | |
[[Datei:image30.png|ohne|mini]] | [[Datei:image30.png|ohne|mini]] | ||
| − | + | You will now see your new created Product Category at the end of the list. | |
[[Datei:image31.png|ohne|mini]] | [[Datei:image31.png|ohne|mini]] | ||
__________________________________________________________________________________________________________________________ | __________________________________________________________________________________________________________________________ | ||
| − | ==== | + | ====Change or Delete Product Categories==== |
| − | + | After logging in, you will be shown the screen with the selection of the individual functions. | |
| − | + | Click here "Sale" | |
[[Datei:Verkauf.png|ohne|mini]] | [[Datei:Verkauf.png|ohne|mini]] | ||
| − | + | You will now see the Sales view. | |
| − | + | Open the list here under Configuration and then click on '''Product Categories''' | |
[[Datei:image26.png|ohne|mini]] | [[Datei:image26.png|ohne|mini]] | ||
| − | + | You will now see the Product categories view. | |
| − | + | You simply select the product category that you want to change or delete. | |
| − | ( | + | (in the example condoms) |
[[Datei:image31.png|ohne|mini]] | [[Datei:image31.png|ohne|mini]] | ||
| − | + | You will now see the editing window (like when creating a new product category). | |
| − | + | If you select 1. in the top left, you can edit the product category. | |
| − | + | The steps after that are the same as when creating a new product category | |
| − | Unter 2. | + | Unter 2. Action you can delete the product category. |
[[Datei:image32.png|ohne|mini]] | [[Datei:image32.png|ohne|mini]] | ||
| − | + | If you have selected delete, you will be asked again whether you really want to delete the data record. | |
[[Datei:image33.png|ohne|mini]] | [[Datei:image33.png|ohne|mini]] | ||
| − | + | After selecting '''OK''' you can check for yourself whether the product category has been deleted. | |
| − | + | To do this, simply select product categories again at the top left and this will take you to the list. | |
| − | + | The condoms entry should now be missing from the list and has therefore been successfully deleted. | |
[[Datei:image34.png|ohne|mini]] | [[Datei:image34.png|ohne|mini]] | ||
| Zeile 836: | Zeile 836: | ||
___________________________________________________________________________________________________________________________ | ___________________________________________________________________________________________________________________________ | ||
| − | ====Backend/ | + | ====Backend/Create/Add and Hide products==== |
| − | + | After logging in, you will be shown the screen with the selection of the individual functions. | |
| − | + | Click here for Sale.[[Datei:Verkauf.png|ohne|mini]] | |
| − | [[Datei:Verkauf.png|ohne|mini]] | ||
| − | + | You will now see the Sales view. | |
| − | + | Open the list under Sales and then click on '''Products'''. | |
[[Datei:image11.png|ohne|mini]] | [[Datei:image11.png|ohne|mini]] | ||
| − | + | You will now see the Products view. Please click on "'''Create'''" here. | |
[[Datei:ProdukteVerkauf3.png|ohne|mini]] | [[Datei:ProdukteVerkauf3.png|ohne|mini]] | ||
| − | + | You will then see the following view and can now add new products, divide them into categories, select the product type and set the sales price. | |
| − | ''' | + | '''Example''' |
| − | + | The fields that have to be filled out are all '''MUST''' fields and '''NONE''' can fields! | |
| − | + | Please proceed step by step..... | |
| − | # | + | #Enter the product name (in the example Chef Salad). |
| − | # | + | #The checkmark Can be sold '''MUST''' be ticked. (if this tick is missing, the product will not be displayed on the POS). |
| − | # | + | #Checkmark '''MUST''' be set for Can be purchased. <u>> Reiter General information tab<</u> |
| − | # | + | #Product type '''MUST''' be selected (service in the example). |
| − | # | + | #Internal reference '''MUST''' be entered (in the example 11). |
| − | # | + | #Internal category '''MUST''' be selected (in the example All/Food). |
| − | # | + | #Selling price '''MUST''' be entered.[[Datei:image12.png|ohne|mini|627x627px]] |
| − | <u>> Reiter | + | <u>> Reiter Sale <</u> |
| − | # | + | #Checkmark '''MUST''' be set at Available at Point Of Sale. |
#Point of Sale Kategorie '''MUSS''' eingetragen werden. (im Beispiel, Speisen).[[Datei:image14.png|ohne|mini|591x591px]]<br /> | #Point of Sale Kategorie '''MUSS''' eingetragen werden. (im Beispiel, Speisen).[[Datei:image14.png|ohne|mini|591x591px]]<br /> | ||
#<u>> Im Reiter Abrechnung < (''hier wird auch die MwSt. eingetragen oder angepasst'')</u> | #<u>> Im Reiter Abrechnung < (''hier wird auch die MwSt. eingetragen oder angepasst'')</u> | ||

