Gate ~ FMCU ~ management dashboard/en: Unterschied zwischen den Versionen
← Gate ~ FMCU ~ management dashboard/en
(→Gates) (Markierung: 2017-Quelltext-Bearbeitung) |
(→Set up a new Gate) (Markierung: 2017-Quelltext-Bearbeitung) |
Inhaltsverzeichnis
General[Bearbeiten | Quelltext bearbeiten]
The Wanzl Access Manager offers a central dashbaord for access controls in a homogeneous interface, displays the corresponding states and supports the user in the administration of these components. The Wanzl Access Manager is a leading platform for monitoring and managing access controls of security areas.
Sign Up[Bearbeiten | Quelltext bearbeiten]
Please enter the login information provided by support here to log in to the central dashboard.
Headline[Bearbeiten | Quelltext bearbeiten]
| Number | Function |
|---|---|
| 1 | Button Management Dashboard |
| 2 | Administration |
| 3 | Events Button |
| 4 | Cards Button |
| 5 | Statistics Button |
| 6 | Logged in User |
| 7 | Log out Button |
| 8 | Languages menu |
| 9 | Adjust the display to entire width of the screen |
Menu items[Bearbeiten | Quelltext bearbeiten]
Facilities[Bearbeiten | Quelltext bearbeiten]
https://<dns-name or ip-address>/gates
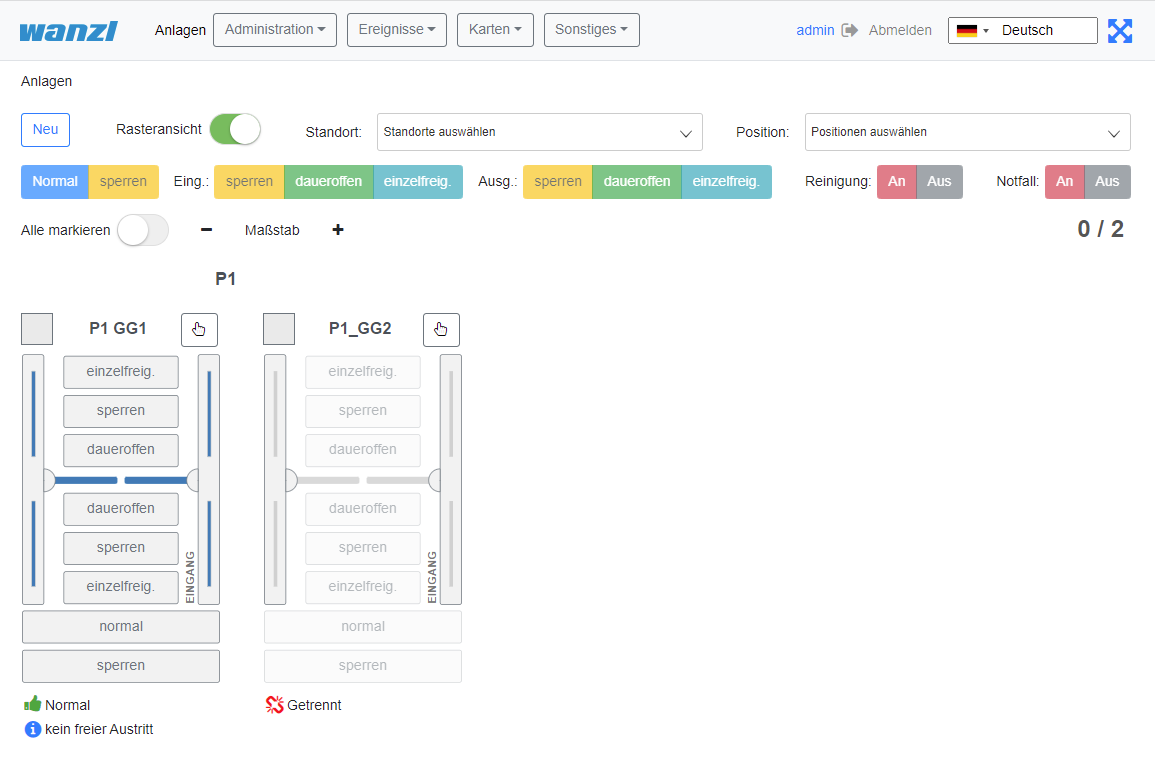
In this view, all access controls are displayed in an intuitive interface. There are grouping options in two categories. First, you can group by Location. Within the location you can then summarize different Locations. Individual gates can be added via the menu item "New".
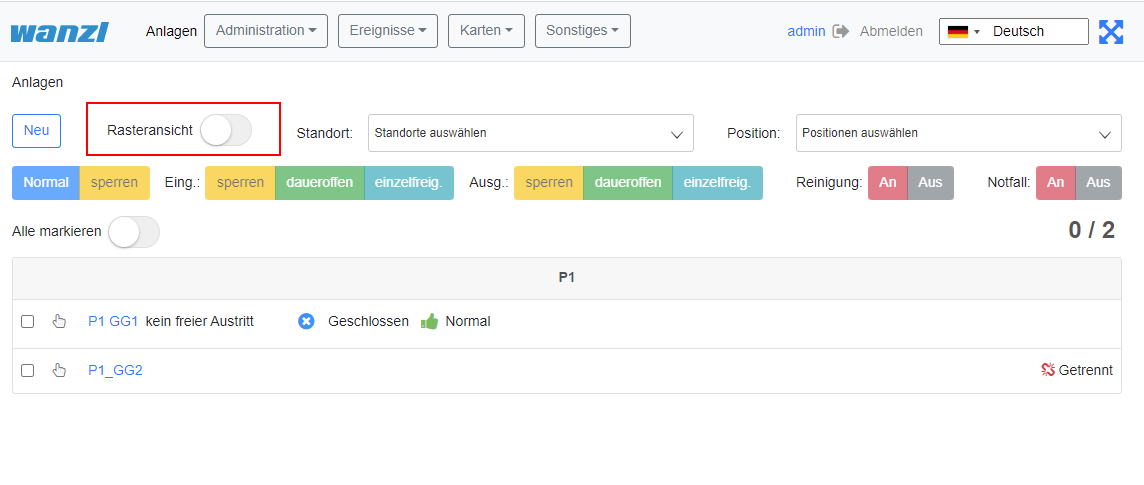
When the light view is off, the access controls are shown in the list.
| Symbol | Description | Note |
|---|---|---|
| change to normal state, lock the doors in both directions | ||
| open the door permanently or open it for a single person | towards the entrance | |
| open the door permanently or open it for a single person | toward the exit | |
| Turn the Cleaning mode on and off | cleansing | |
| Toggle Emergency Open mode on and off | Emergency |
The Gate display contains the following controls:
| Symbol | Description | Note |
|---|---|---|
| choose the gate | to activate the buttons above (Normal, Lock Out, etc.) | |
| Navigate to the Facilities page | ||
| Navigate to the pageGate-View | ||
| change to Normal state | ||
| lock the doors in both directions | ||
| open the door in the direction of entrance/exit for a single person | ||
| lock the door in the direction of entrance/exit | ||
| permanently open the door in the direction of entrance/exit |
The symbols under the gate convey various information about it:
| Symbol | Description | Note |
|---|---|---|
| No connection to the gate | ||
| The gate is in the Normal state | ||
| The gate is in the Locked state | ||
| The gate is in the fire alarm state | ||
| The gate is in the emergency open state | ||
| The cleaning mode is active | ||
| Alarm is active at the gate | ||
| The gate is permanently open | ||
| One or more devices at the gate have failed | ||
| Current selected configuration of the gate | Only if there are two or more configurations at the gate |
Gate-View[Bearbeiten | Quelltext bearbeiten]
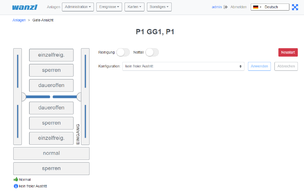
In this view, you can observe the state of each gate, control the gate, and apply the gate's configurations (if there are two or more).
These buttons allow you to perform various actions:
| Symbol | Description | Note |
|---|---|---|
| Turn cleaning mode on and off | ||
| Manually switch the emergency open state on and off | ||
| Restart the gate | ||
| Choose a new configuration of the gate from the combo box | Only if there are two or more configurations at the gate | |
| Apply the new configuration | ||
| Do without the new configuration |
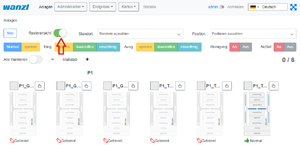
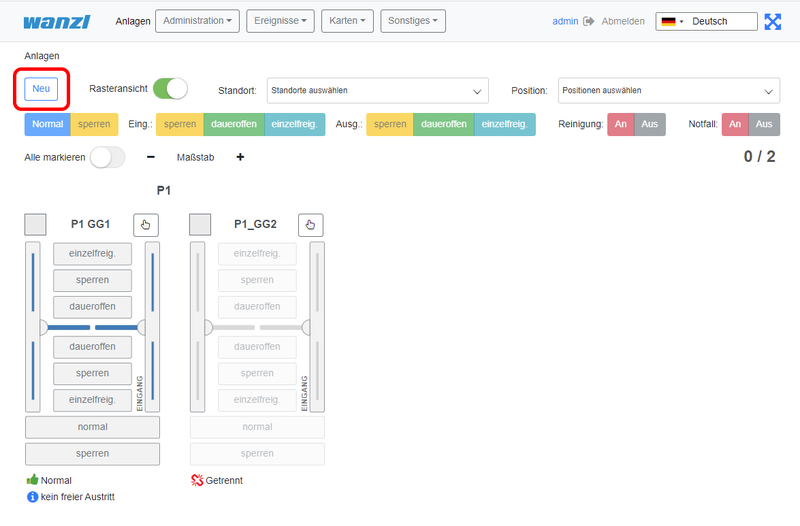
Bitte klicken Sie auf Neu
Set up a new Gate[Bearbeiten | Quelltext bearbeiten]
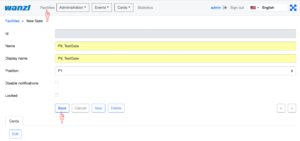
In this view you create a New gate. The fields Names, Displayed Name and Position of the Gate must be verified with values. Then click on Facilities.
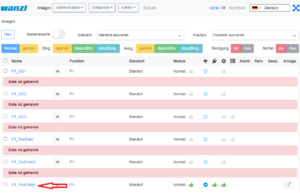
You can now see in the view that you have created a NEW gate, in this case the fourth gate in this view.
In the next step you connect the gate to the server.
https://<IP-Adresse des Dashboards>
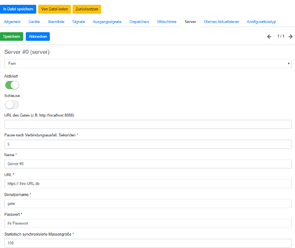
Then check the following points on the Server tab.
Server#0 (server)- must be set to remote.
Activated slide-switch is activated.
Your server should be entered under Name*.
Your URL should be entered under URL*.
Gate should be entered under Username*.
Your password should be entered under Password*.
Save at the end.
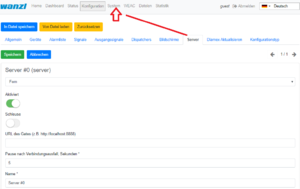
In the next step, please click on System in the top bar.
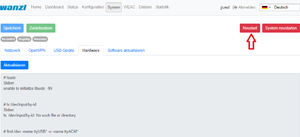
You will now see the following display, here please press restart once. Now your new gate should be connected.
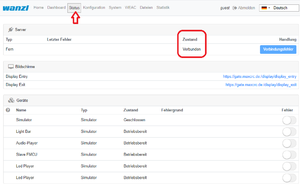
Finally, you can check the connection in the Status tab. CONNECTED must now appear under State.
Edit existing Gate[Bearbeiten | Quelltext bearbeiten]
https://<dns-name or ip-address>/gates
You are in the same view as where you would create a new gate.
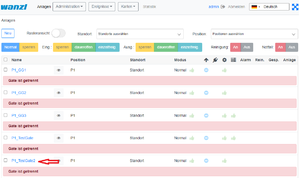
Please move the slide switch "Grid view" to the left.
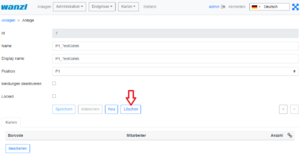
In the view click on the name of the gate which you want to edit (in the example P1_TestGate2).
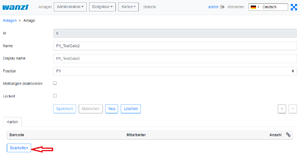
In this view, please press the "Edit" function.
You can now edit the gate in this view.
Remove Gate[Bearbeiten | Quelltext bearbeiten]
https://<dns-name or ip-address>/gates
You are in the same view as where you would create a new gate.
Please move the slide switch "Grid view" to the left.In the view click on the name of the gate which you want to delete (in the example P1_TestGate6).
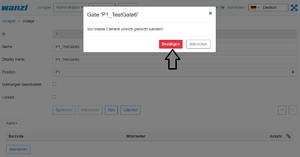
In this view, please press the "Delete" function.
To be on the safe side, you will now be asked again whether you really want to delete the element? Please confirm this.
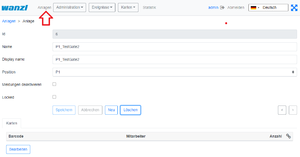
After deleting, you will automatically be shown the next gate (here in the example P1_TestGate2). Please click on attachments here.
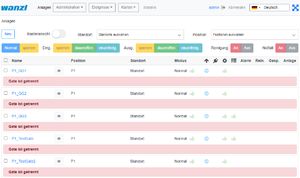
You will then see in the grid view that Gate P1_TestGate6 is missing and has been successfully deleted.
Administration[Bearbeiten | Quelltext bearbeiten]
User[Bearbeiten | Quelltext bearbeiten]
https://<dns-name or ip-address>/users
Auf dieser Seite sehen Sie eine Übersicht aller Benutzer 
| Nummer | Funktion |
|---|---|
| 1 | Neuen Benutzer anlegen |
| 2 | Benutzer nach Standort filtern |
| 3 | Benutzer nach Postition filtern |
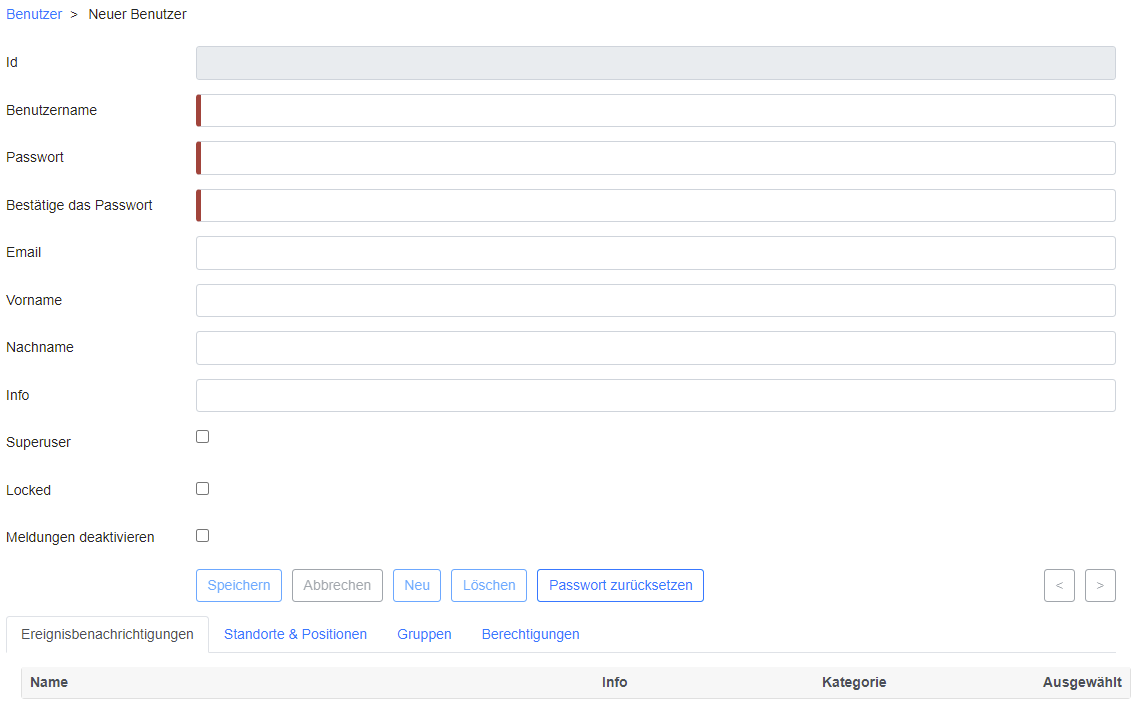
Set up new User[Bearbeiten | Quelltext bearbeiten]
Klicken Sie unter Benutzer auf den Button Neu
https://<dns-name or ip-address>/new-user
| Feldname | Beschreibung |
|---|---|
| Id | Automatisch generierte eindeutige Nummer des Benutzers |
| Benutzername* | Benutzername des Benutzers für die Anmeldung |
| Passwort* | Passwort des Benutzers für die Anmeldung |
| Email Adresse des Benutzers zum Versand von Log Nachrichten | |
| Vorname | Vorname des Benutzers |
| Nachname | Nachname des Benutzers |
| Info | Beschreibung des Benutzers |
| Superuser | Die höchsten Rechte werden dem Benutzer vergeben |
| Locked | Die Anmeldung des Benutzers ist gesperrt |
| Meldungen deaktivieren | Der Benutzer erhält keine Benachritgungen im FMCU Management Dashboard |
* Unbedingt erforderliche Felder Durch den Button Speichern wird der neue Benutzer angelegt.
Edit existing User[Bearbeiten | Quelltext bearbeiten]
Klicken Sie unter Benutzer auf den zu bearbeitenden Benutzer
Event Notifications[Bearbeiten | Quelltext bearbeiten]
Unter diesem Reiter können die Benachrichtigungen ausgewählt werden welcher der Benutzer erhalten soll.
Hinweis: Ist die Checkbox Meldungen deaktivieren gesetzt werden unabhängig von diesen Einstellungen keine Benachrichtigungen angezeigt.
Locations & Positions Tab[Bearbeiten | Quelltext bearbeiten]
Man kann unterschiedliche Standorte in Länder und Städte festlegen. Über das Berechtigungsmodell lassen sich separate Zugriffsrechte für jeden Standort definieren.
Groups Tab[Bearbeiten | Quelltext bearbeiten]
Unter diesem Reiter können Sie die Gruppenmitgliedschaften des Benutzers anpassen.
Permissions Tab[Bearbeiten | Quelltext bearbeiten]
Unter diesem Reiter werden die Berechtigungen des Benutzers angezeigt
Durch den Button Speichern werden alle Änderungen angewendet.
Groups[Bearbeiten | Quelltext bearbeiten]
https://<dns-name or ip-address>/groups
Auf dieser Seite sehen Sie eine Übersicht aller Gruppen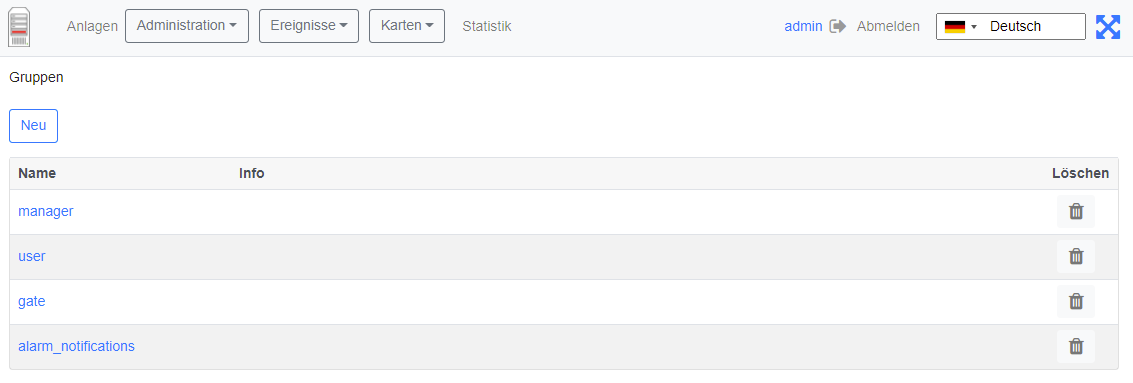
Set up new Group[Bearbeiten | Quelltext bearbeiten]
https://<dns-name or ip-address>/new-group
Klicken Sie unter Gruppen auf den Button Neu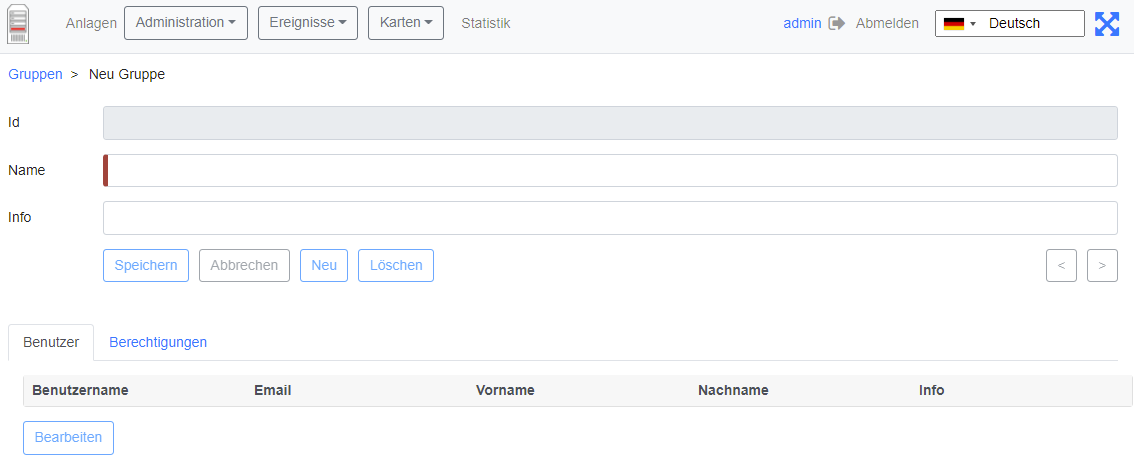
| Feldname | Beschreibung |
|---|---|
| Id | Automatisch generierte eindeutige Nummer der Gruppe |
| Name | Name der Gruppe |
| Info | Beschreibung der Gruppe |
* Unbedingt erforderliche Felder
Durch den Button Speichern wird die neue Gruppe angelegt.
Edit existing Group[Bearbeiten | Quelltext bearbeiten]
Klicken Sie unter Gruppen auf die zu bearbeitende Gruppe
Users Tab[Bearbeiten | Quelltext bearbeiten]
Unter diesem Reiter können Sie die Mitglieder der Gruppe anpassen.
Permissions Tab[Bearbeiten | Quelltext bearbeiten]
Unter diesem Reiter werden die Berechtigungen angezeigt welche den Mitgliedern der Gruppe vererbt werden.
Durch den Button Speichern werden alle Änderungen angewendet.
Positions[Bearbeiten | Quelltext bearbeiten]
https://<dns-name or ip-address>/cities
On this page you can see an overview of all positions
Set up new Position[Bearbeiten | Quelltext bearbeiten]
https://<dns-name or ip-address>/new-city
Under Positions click on the button New Enter the name of the position and assign the position to a location using the dropdown field. Click on the Save button to create the position
Edit existing Position[Bearbeiten | Quelltext bearbeiten]
Under Positions click to edit the position
Here you can edit the position name and location
Locations[Bearbeiten | Quelltext bearbeiten]
https://<dns-name or ip-address>/countries
Auf dieser Seite sehen Sie eine Übersicht aller Standorte
Set up new Location[Bearbeiten | Quelltext bearbeiten]
https://<dns-name or ip-address>/new-country
Klicken Sie unter Standorte auf den Button Neu
| Feldname | Beschreibung |
|---|---|
| Id | Automatisch generierte eindeutige Nummer des Standorts |
| Name* | Name des Standorts |
| Code* | Ländercode des Standorts |
| Info | Beschreibung des Standorts |
* Unbedingt erforderliche Felder
Klicken Sie auf den Button Speichern umd die Position anzulegen
Edit existing Location[Bearbeiten | Quelltext bearbeiten]
Under Location Under Location, click the location you want to edit
Hier können Sie die den Namen, den Code sowie die Info des Standorts bearbeiten
Locations & Positions[Bearbeiten | Quelltext bearbeiten]
https://<dns-name or ip-address>/locations
Here you can see an overview of all positions and their assigned locations
Configuration[Bearbeiten | Quelltext bearbeiten]
https://<dns-name or ip-address>/configurations
Events[Bearbeiten | Quelltext bearbeiten]
Events[Bearbeiten | Quelltext bearbeiten]
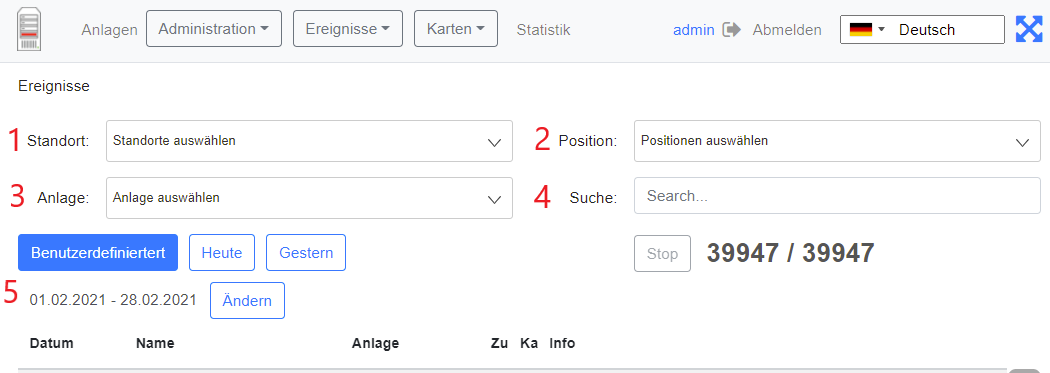
https://<dns-name or ip-address>/events
In this view, the events of all access controls are shown in an intuitive list view. There are filtering options and a name search for the events.
The following filters can be set:
- Location
- Position
- Factory
- Search by Event name
- Time Period
Event Definitions[Bearbeiten | Quelltext bearbeiten]
https://<dns-name or ip-address>/event-definitions
In this view, all events that the FMCU contains are listed and their event definition groups, supported states and categories are assigned.
Event definition Groups[Bearbeiten | Quelltext bearbeiten]
https://<dns-name or ip-address>/event-definition-groups
All event definition groups are listed under this tab.
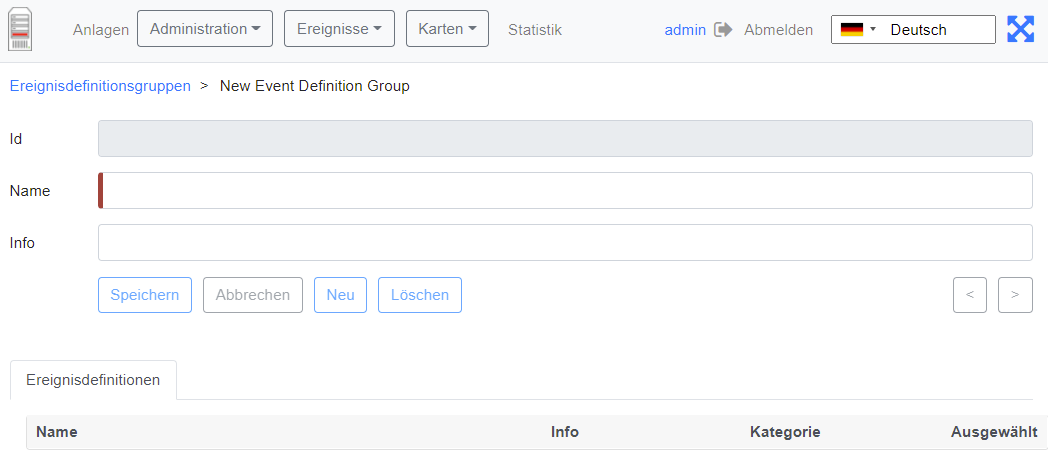
Create a new Event definition Group[Bearbeiten | Quelltext bearbeiten]
Click Event defenition groups on the Button New
| Fieldname | Description |
|---|---|
| ID | Automatically generated unique group number |
| Name | Name of the group |
| Info | Group description |
* Absolutely required fields
Under the Event defenition tab select the event definitions that are to be assigned to the group.
Event Subscriptions[Bearbeiten | Quelltext bearbeiten]
https://<dns-name or ip-address>/event-subscriptions
There is the possibility to link groups of alarm messages with groups of users. As a result, only group members are notified of alarm messages that are also grouped,
| Fieldname | Description |
|---|---|
| ID | internal value |
| Group | Summary of users |
| Ereignisdefinitionsgruppe | Event definition group |
| Locked | Notifications deactivated/activated |
| Info | Description field |
Notifications[Bearbeiten | Quelltext bearbeiten]
https://<dns-name or ip-address>/notifications
Sent notifications are displayed in this overview. You can adjust the view accordingly using a date filter.
Cards[Bearbeiten | Quelltext bearbeiten]
Cards[Bearbeiten | Quelltext bearbeiten]
https://<dns-name or ip-address>/cards
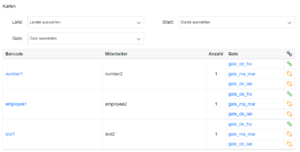
This view shows an overview of the RFID cards in the system with the gates enabled for access.
Edit Cards[Bearbeiten | Quelltext bearbeiten]
https://<dns-name or ip-address>/cards-edit
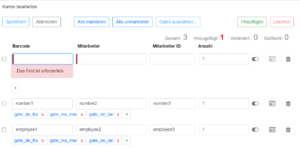
In this view, cards can be added / removed and authorizations for individual gates can be defined.
| Field | Description |
|---|---|
| Barcode | Card content that is captured by the reader |
| Employee | Description field |
| Employee ID | Description field |
| Quantity | Number of accesses for this card |
Statistics[Bearbeiten | Quelltext bearbeiten]
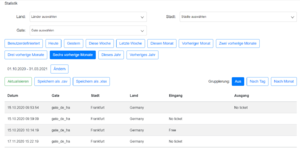
In this view, all activities for the assigned access controls are shown. You can adjust the view with date filters. It is possible to group the screen output, e.g. only to evaluate the number per day or month. Finally, the data can be exported in Excel format or CSV-format.
{{translate|Wanzl Access Manager ~ Management Dashboard}}


        {{DISPLAYTITLE:Wanzl Access Manager ~ Management Dashboard}}


        __TOC__

<br />
        <br />
        <br />
        <br />


        =General=

        The Wanzl Access Manager offers a central dashbaord for access controls in a homogeneous interface, displays the corresponding states and supports the user in the administration of these components. The Wanzl Access Manager is a leading platform for monitoring and managing access controls of security areas.

<br />


        =Sign Up=

        Please enter the login information provided by support here to log in to the central dashboard.


        [[Datei:FMCU Signup.png|ohne|link|600x600px]]

<br />


        =Headline=

        [[Datei:FMCU_Headline.png|rahmenlos|1000x1000px]]

        {| class="wikitable"

        !Number

        !Function

        |-

        |1

        |Button Management Dashboard

        |-

        |2

        |Administration

        |-

        |3

        |Events Button

        |-

        |4

        |Cards Button

        |-

        |5

        |Statistics Button

        |-

        |6

        |Logged in User

        |-

        |7

        |Log out Button

        |-

        |8

        |Languages menu

        |-

        |9

        |Adjust the display to entire width of the screen

        |}
        <br /><br />


        =Menu items=

        ==Facilities==
        <syntaxhighlight>

        https://<dns-name or ip-address>/gates
        </syntaxhighlight>

        In this view, all access controls are displayed in an intuitive interface. There are grouping options in two categories. First, you can group by '''Location'''. Within the location you can then summarize different '''Locations'''.

        Individual gates can be added via the menu item "'''New'''".

        [[Datei:FMCU-Server-Raster-Ansicht.png|ohne|800x528]]

<br />


        When the light view is off, the access controls are shown in the list.


        [[Datei:FMCU-Server-Liste-Ansicht.png|ohne|800x528]]

<br />


        When one or more facilities are selected with the control,[[Datei:FMCU-Server-Check-Select.png|ohne|link=]] the facilities can be controlled with the following buttons:

        {| class="wikitable"

        |+

        !'''Symbol'''

        !'''Description'''

        !'''Note'''

        |-

        |[[Datei:FMCU-Server-Button-Normal-Sperren.png|ohne|link=]]

        |change to normal state, lock the doors in both directions

        |

        |-

        |[[Datei:FMCU-Server-Button-Sperren-Dauer-Einzeln.png|ohne|link=]]

        |open the door permanently or open it for a single person

        |towards the entrance

        |-

        |[[Datei:FMCU-Server-Button-Sperren-Dauer-Einzeln.png|ohne|link=]]

        |open the door permanently or open it for a single person

        |toward the exit

        |-

        |[[Datei:FMCU-Server-Button-An-Aus.png|ohne|link=]]

        |Turn the '''Cleaning''' mode on and off

        |cleansing

        |-

        |[[Datei:FMCU-Server-Button-An-Aus.png|ohne|link=]]

        |Toggle '''Emergency Open''' mode on and off

        |Emergency

        |}

<br />

        The Gate display contains the following controls:

        {| class="wikitable"

        |+

        !'''Symbol'''

        !'''Description'''

        !'''Note'''

        |-

        |[[Datei:FMCU-Server-Check-Select.png|ohne|link=]]

        |choose the gate

        |to activate the buttons above ('''Normal''', '''Lock Out''', etc.)

        |-

        |[[Datei:FMCU-Server-Link-Gate.png|ohne|link=]]

        |Navigate to the '''Facilities''' page

        |

        |-

        |[[Datei:FMCU-Server-Button-Gate-View.png|ohne|link=]]

        |Navigate to the page'''Gate-View'''

        |

        |-

        |[[Datei:FMCU-Server-Button-Normal.png|ohne|link=]]

        |change to Normal state

        |

        |-

        |[[Datei:FMCU-Server-Button-Sperren.png|ohne|link=]]

        |lock the doors in both directions

        |

        |-

        |[[Datei:FMCU-Server-Button-Einzelnfreig.png|ohne|link=]]

        |open the door in the direction of entrance/exit for a single person

        |

        |-

        |[[Datei:FMCU-Server-Button-Einzelnfreig.png|ohne|link=]]

        |lock the door in the direction of entrance/exit

        |

        |-

        |[[Datei:FMCU-Server-Button-DauerOffen.png|ohne|link=]]

        |permanently open the door in the direction of entrance/exit

        |

        |}

<br />

        The symbols under the gate convey various information about it:

        {| class="wikitable"

        |+

        !'''Symbol'''

        !'''Description'''

        !'''Note'''

        |-

        |[[Datei:FMCU-Server-Disconnected.png|ohne|link=]]

        |No connection to the gate

        |

        |-

        |[[Datei:FMCU-Server-Icon-Normal.png|ohne|link=]]

        |The gate is in the Normal state

        |

        |-

        |[[Datei:FMCU-Server-Icon-Locked.png|ohne|link=]]

        |The gate is in the Locked state

        |

        |-

        |[[Datei:FMCU-Server-Icon-Firealarm.png|ohne|link=]]

        |The gate is in the fire alarm state

        |

        |-

        |[[Datei:FMCU-Server-Icon-Emergency.png|ohne|link=]]

        |The gate is in the emergency open state

        |

        |-

        |[[Datei:FMCU-Server-Icon-Clearance.png|ohne|link=]]

        |The cleaning mode is active

        |

        |-

        |[[Datei:FMCU-Server-Icon-Alarm.png|ohne|link=]]

        |Alarm is active at the gate

        |

        |-

        |[[Datei:FMCU-Server-Icon-Service.png|ohne|link=]]

        |The gate is permanently open

        |

        |-

        |[[Datei:FMCU-Server-Failed-Device.png|ohne|link=]]

        |One or more devices at the gate have failed

        |

        |-

        |[[Datei:FMCU-Server-Configuration.png|ohne|link=]]

        |Current selected configuration of the gate

        |Only if there are two or more configurations at the gate

        |}

<br />

        ====Gate-View====

        In this view, you can observe the state of each gate, control the gate, and apply the gate's configurations (if there are two or more).


        [[Datei:FMCU-Server-Gate-Ansicht.png|ohne|mini|304x304px]]

<br />

        These buttons allow you to perform various actions:

        {| class="wikitable"

        |+

        !'''Symbol'''

        !'''Description'''

        !'''Note'''

        |-

        |[[Datei:FMCU-Server-Button-Clearance.png|ohne|link=]]

        |Turn cleaning mode on and off

        |

        |-

        |[[Datei:FMCU-Server-Button-Emergency.png|ohne|link=]]

        |Manually switch the emergency open state on and off

        |

        |-

        |[[Datei:FMCU-Server-Button-Restart.png|ohne|link=]]

        |Restart the gate

        |

        |-

        |[[Datei:FMCU-Server-Combo-Configuration.png|ohne|link=]]

        |Choose a new configuration of the gate from the combo box

        |Only if there are two or more configurations at the gate

        |-

        |[[Datei:FMCU-Server-Button-Apply.png|ohne|link=]]

        |Apply the new configuration

        |

        |-

        |[[Datei:FMCU-Server-Button-Cancel.png|ohne|link=]]

        |Do without the new configuration

        |

        |}

Bitte klicken Sie auf '''Neu'''


            [[Datei:FMCU-Server-Neues-Gate.png|ohne|mini|800x526px]]

<br/>
            ====<big>Set up a new Gate</big>====

        In this view you create a '''New''' gate. The fields '''Names''', '''Displayed''' '''Name''' and '''Position''' of the Gate must be verified with values. Then click on Facilities.

        [[Datei:FMCU NewGate.png|ohne|mini]]

        You can now see in the view that you have created a '''NEW''' gate,

        in this case the fourth gate in this view.

        [[Datei:FMCU NewGatemain.png|ohne|mini]]


        In the next step you connect the gate to the server.
        <syntaxhighlight>

        https://<IP-Adresse des Dashboards>
        </syntaxhighlight>To do this, check on the '''General''' tab that the correct gate name has been entered.

        [[Datei:FMCU 5.png|ohne|mini]]

        Then check the following points on the '''Server''' tab.


        Server#0 (server)- must be set to remote.


        Activated slide-switch is activated.


        Your server should be entered under Name*.


        Your URL should be entered under URL*.


        Gate should be entered under Username*.


        Your password should be entered under Password*.


        '''Save''' at the end.

        [[Datei:FMCU7.png|ohne|mini|295x295px]]


        In the next step, please click on System in the top bar.

        [[Datei:FMCU9.png|ohne|mini]]


        You will now see the following display, here please press restart once. Now your new gate should be connected.

        [[Datei:FMCU10.png|ohne|mini]]


        Finally, you can check the connection in the '''Status''' tab. '''CONNECTED''' must now appear under State.

        [[Datei:FMCU11.png|ohne|mini]]<br />


        ====Edit existing Gate====
        <syntaxhighlight>

        https://<dns-name or ip-address>/gates
        </syntaxhighlight>

        You are in the same view as where you would create a new gate.


        Please move the slide switch "Grid view" to the left.[[Datei:FMCU12.png|ohne|mini]]


        In the view click on the name of the gate which you want to edit (in the example P1_TestGate2).

        [[Datei:FMCU18.png|ohne|mini]]


        In this view, please press the "Edit" function.

        [[Datei:FMCU19.png|ohne|mini]]


        You can now edit the gate in this view.

        [[Datei:FMCU20.png|ohne|mini]]


        ====Remove Gate====
        <syntaxhighlight>

        https://<dns-name or ip-address>/gates
        </syntaxhighlight>

        You are in the same view as where you would create a new gate.


        Please move the slide switch "Grid view" to the left.[[Datei:FMCU12.png|ohne|mini]]

        In the view click on the name of the gate which you want to delete (in the example P1_TestGate6).

        [[Datei:FMCU13.png|ohne|mini]]

        In this view, please press the "Delete" function.

        [[Datei:FMCU14.png|ohne|mini]]

        To be on the safe side, you will now be asked again whether you really want to delete the element? Please confirm this.

        [[Datei:FMCU15.png|ohne|mini]]

        After deleting, you will automatically be shown the next gate (here in the example P1_TestGate2). Please click on attachments here.

        [[Datei:FMCU16.png|ohne|mini]]

        You will then see in the grid view that Gate P1_TestGate6 is missing and has been successfully deleted.

        [[Datei:FMCU17.png|ohne|mini]]<br />


        ==Administration==

        ===User===
        <syntaxhighlight>

        https://<dns-name or ip-address>/users
        </syntaxhighlight>

        Auf dieser Seite sehen Sie eine Übersicht aller Benutzer

        [[Datei:Gate_~_FMCU_~_management_dashboard_Users.png|rahmenlos|1241x1241px]]

        {| class="wikitable"

        !Nummer

        !Funktion

        |-

        |1

        |Neuen Benutzer anlegen

        |-

        |2

        |Benutzer nach Standort filtern

        |-

        |3

        |Benutzer nach Postition filtern

        |}
        <br />

        ====Set up new User====

        Klicken Sie unter [[#Benutzer| Benutzer]] auf den Button '''Neu'''
        <syntaxhighlight>

        https://<dns-name or ip-address>/new-user
        </syntaxhighlight>

        [[Datei:Gate ~ FMCU ~ management dashboard new Users.png|rahmenlos|1139x1139px]]

        {| class="wikitable"

        !Feldname

        !Beschreibung

        |-

        |Id

        |Automatisch generierte eindeutige Nummer des Benutzers

        |-

        |Benutzername*

        |Benutzername des Benutzers für die Anmeldung

        |-

        |Passwort*

        |Passwort des Benutzers für die Anmeldung

        |-

        |Email

        |Email Adresse des Benutzers zum Versand von Log Nachrichten

        |-

        |Vorname

        |Vorname des Benutzers

        |-

        |Nachname

        |Nachname des Benutzers

        |-

        |Info

        |Beschreibung des Benutzers

        |-

        |Superuser

        |Die höchsten Rechte werden dem Benutzer vergeben

        |-

        |Locked

        |Die Anmeldung des Benutzers ist gesperrt

        |-

        |Meldungen deaktivieren

        |Der Benutzer erhält keine Benachritgungen im FMCU Management Dashboard

        |}

        '''*''' Unbedingt erforderliche Felder

        Durch den Button '''Speichern''' wird der neue Benutzer angelegt.

        ====Edit existing User====

        Klicken Sie unter [[#Benutzer | Benutzer]] auf den zu bearbeitenden Benutzer

        =====Event Notifications=====

        Unter diesem Reiter können die Benachrichtigungen ausgewählt werden welcher der Benutzer erhalten soll.<br />'''Hinweis:''' Ist die Checkbox '''Meldungen deaktivieren''' gesetzt werden unabhängig von diesen Einstellungen keine Benachrichtigungen angezeigt.<br />

        =====Locations & Positions Tab=====

        Man kann unterschiedliche Standorte in Länder und Städte festlegen. Über das Berechtigungsmodell lassen sich separate Zugriffsrechte für jeden Standort definieren.
        <br />

        =====Groups Tab=====

        Unter diesem Reiter können Sie die Gruppenmitgliedschaften des Benutzers anpassen.
        <br />

        =====Permissions Tab=====

        Unter diesem Reiter werden die Berechtigungen des Benutzers angezeigt
        <br />

        Durch den Button '''Speichern''' werden alle Änderungen angewendet.

<br /><br /><br />

        ===Groups===
        <syntaxhighlight>

        https://<dns-name or ip-address>/groups
        </syntaxhighlight>

        Auf dieser Seite sehen Sie eine Übersicht aller Gruppen[[Datei:Gate ~ FMCU ~ management dashboard groups.png|rahmenlos|1133x1133px]]<br /><br />

        ====Set up new Group====

<syntaxhighlight>

        https://<dns-name or ip-address>/new-group
        </syntaxhighlight>

        Klicken Sie unter [[#Gruppen | Gruppen]] auf den Button '''Neu'''[[Datei:Gate ~ FMCU ~ management dashboard new groups.png|rahmenlos|1134x1134px]]

        {| class="wikitable"

        !Feldname

        !Beschreibung

        |-

        |Id

        |Automatisch generierte eindeutige Nummer der Gruppe

        |-

        |Name

        |Name der Gruppe

        |-

        |Info

        |Beschreibung der Gruppe

        |}

        '''*''' Unbedingt erforderliche Felder
        <br />


        Durch den Button '''Speichern''' wird die neue Gruppe angelegt.

<br />


        ====Edit existing Group====

        Klicken Sie unter [[#Gruppen | Gruppen]] auf die zu bearbeitende Gruppe

        =====Users Tab=====

        Unter diesem Reiter können Sie die Mitglieder der Gruppe anpassen.


        =====Permissions Tab=====

        Unter diesem Reiter werden die Berechtigungen angezeigt welche den Mitgliedern der Gruppe vererbt werden.
        <br />Durch den Button '''Speichern''' werden alle Änderungen angewendet.

<br />


        ===Positions===
        <syntaxhighlight>

        https://<dns-name or ip-address>/cities
        </syntaxhighlight>

        On this page you can see an overview of all positions

        ====Set up new Position====
        <syntaxhighlight>

        https://<dns-name or ip-address>/new-city
        </syntaxhighlight>

        Under [[#Positions | Positions]] click on the button '''New'''

        Enter the name of the position and assign the position to a location using the dropdown field.

        Click on the '''Save''' button to create the position

        ====Edit existing Position====

        Under [[#Positions| Positions]] click to edit the position
        <br />

        Here you can edit the position name and location

<br /><br /><br />


        ===Locations===
        <syntaxhighlight>

        https://<dns-name or ip-address>/countries
        </syntaxhighlight>

        Auf dieser Seite sehen Sie eine Übersicht aller Standorte

        ====Set up new Location====
        <syntaxhighlight>

        https://<dns-name or ip-address>/new-country
        </syntaxhighlight>

        Klicken Sie unter [[#Standorte | Standorte]] auf den Button '''Neu'''

        {| class="wikitable"

        !Feldname

        !Beschreibung

        |-

        |Id

        |Automatisch generierte eindeutige Nummer des Standorts

        |-

        |Name*

        |Name des Standorts

        |-

        |Code*

        |Ländercode des Standorts

        |-

        |Info

        |Beschreibung des Standorts

        |}

        '''*''' Unbedingt erforderliche Felder
        <br />

        Klicken Sie auf den Button '''Speichern''' umd die Position anzulegen


        ====Edit existing Location====

        Under [[#Location| Location]] Under Location, click the location you want to edit<br />Hier können Sie die den Namen, den Code sowie die Info des Standorts bearbeiten


        ===Locations & Positions===
        <syntaxhighlight>

        https://<dns-name or ip-address>/locations
        </syntaxhighlight>

        Here you can see an overview of all positions and their assigned locations


        ===Configuration===
        <syntaxhighlight>

        https://<dns-name or ip-address>/configurations
        </syntaxhighlight>


        ==Events==


        ===Events===
        <syntaxhighlight>

        https://<dns-name or ip-address>/events
        </syntaxhighlight>

        In this view, the events of all access controls are shown in an intuitive list view. There are filtering options and a name search for the events.


        [[Datei:Gate ~ FMCU ~ management dashboard Events.png|rahmenlos|1050x1050px]]


        The following filters can be set:


        #Location

        #Position

        #Factory

        #Search by Event name

        #Time Period


        ===Event Definitions===
        <syntaxhighlight>

        https://<dns-name or ip-address>/event-definitions
        </syntaxhighlight>

        In this view, all events that the FMCU contains are listed and their event definition groups, supported states and categories are assigned.[[Datei:Gate ~ FMCU ~ management dashboard event-definitions.png|rahmenlos|1037x1037px]]


        ===Event definition Groups===
        <syntaxhighlight>

        https://<dns-name or ip-address>/event-definition-groups
        </syntaxhighlight>

        All event definition groups are listed under this tab.[[Datei:Gate ~ FMCU ~ management dashboard event-definition-groups.png|rahmenlos|1038x1038px]]


        ====Create a new Event definition Group====

        Click [[#Event defenition groups|Event defenition groups]] on the Button '''New'''


        [[Datei:Gate ~ FMCU ~ management dashboard new event-definition-group.png|rahmenlos|1048x1048px]]

        {| class="wikitable"

        !Fieldname

        !Description

        |-

        |ID

        |Automatically generated unique group number

        |-

        |Name

        |Name of the group

        |-

        |Info

        |Group description

        |}

        '''*''' Absolutely required fields


        Under the '''Event defenition''' tab select the event definitions that are to be assigned to the group.

<br />


        ===Event Subscriptions===
        <syntaxhighlight>

        https://<dns-name or ip-address>/event-subscriptions
        </syntaxhighlight>

        There is the possibility to link groups of alarm messages with groups of users. As a result, only group members are notified of alarm messages that are also grouped,
        <br />

        [[Datei:image event subscription.png|ohne|mini]]


        {| class="wikitable"

        |+

        !Fieldname

        !Description

        |-

        |ID

        |internal value

        |-

        |Group

        |Summary of users

        |-

        |Ereignisdefinitionsgruppe

        |Event definition group

        |-

        |Locked

        |Notifications deactivated/activated

        |-

        |Info

        |Description field

        |}


        ===Notifications===
        <syntaxhighlight>

        https://<dns-name or ip-address>/notifications
        </syntaxhighlight>

        Sent notifications are displayed in this overview. You can adjust the view accordingly using a date filter.

        [[Datei:image notofication statistics.png|ohne|mini]]
        <br />


        ==Cards==


        ===Cards===
        <syntaxhighlight>

        https://<dns-name or ip-address>/cards
        </syntaxhighlight>

        This view shows an overview of the RFID cards in the system with the gates enabled for access.

        [[Datei:image card overview.png|ohne|mini]]


        ===Edit Cards===
        <syntaxhighlight>

        https://<dns-name or ip-address>/cards-edit
        </syntaxhighlight>

        In this view, cards can be added / removed and authorizations for individual gates can be defined.

        [[Datei:image card settings.png|ohne|mini]]
        <br />

        {| class="wikitable"

        |+

        !Field

        !Description

        |-

        |Barcode

        |Card content that is captured by the reader

        |-

        |Employee

        |Description field

        |-

        |Employee ID

        |Description field

        |-

        |Quantity

        |Number of accesses for this card

        |}


        ==Statistics==

        In this view, all activities for the assigned access controls are shown. You can adjust the view with date filters. It is possible to group the screen output, e.g. only to evaluate the number per day or month. Finally, the data can be exported in Excel format or CSV-format.

        [[Datei:image statistics.png|ohne|mini]]
        <br />

<br />


        {{DEFAULTSORT:FMCU Galaxy Gate ~ Management Dashboard}}

<br /><span name="Roadmap"></span>

[[Kategorie:Galaxy Gate EN]]| Zeile 232: | Zeile 232: | ||
|} | |} | ||
| + | Bitte klicken Sie auf '''Neu''' | ||
| + | |||
| + | [[Datei:FMCU-Server-Neues-Gate.png|ohne|mini|800x526px]] | ||
| + | |||
| + | <br/> | ||
====<big>Set up a new Gate</big>==== | ====<big>Set up a new Gate</big>==== | ||
In this view you create a '''New''' gate. The fields '''Names''', '''Displayed''' '''Name''' and '''Position''' of the Gate must be verified with values. Then click on Facilities. | In this view you create a '''New''' gate. The fields '''Names''', '''Displayed''' '''Name''' and '''Position''' of the Gate must be verified with values. Then click on Facilities. | ||

